Well, the good news is, even though the option to enable live tiles has been removed from Windows 11, users can use a third-party app called Live Tiles Anywhere to enable them. Let’s discuss how you can use the Live Tiles Anywhere app to create live tiles and widgets in Windows 11.
Creating Live Tiles
To create live tiles using the Live Tiles Anywhere application in Windows 11, follow the steps given below-
Head to the Microsoft Store by searching for it on the Start Menu. In the Microsoft Store, search for Live Tiles Anywhere and select the app from the Pasqui Industry.
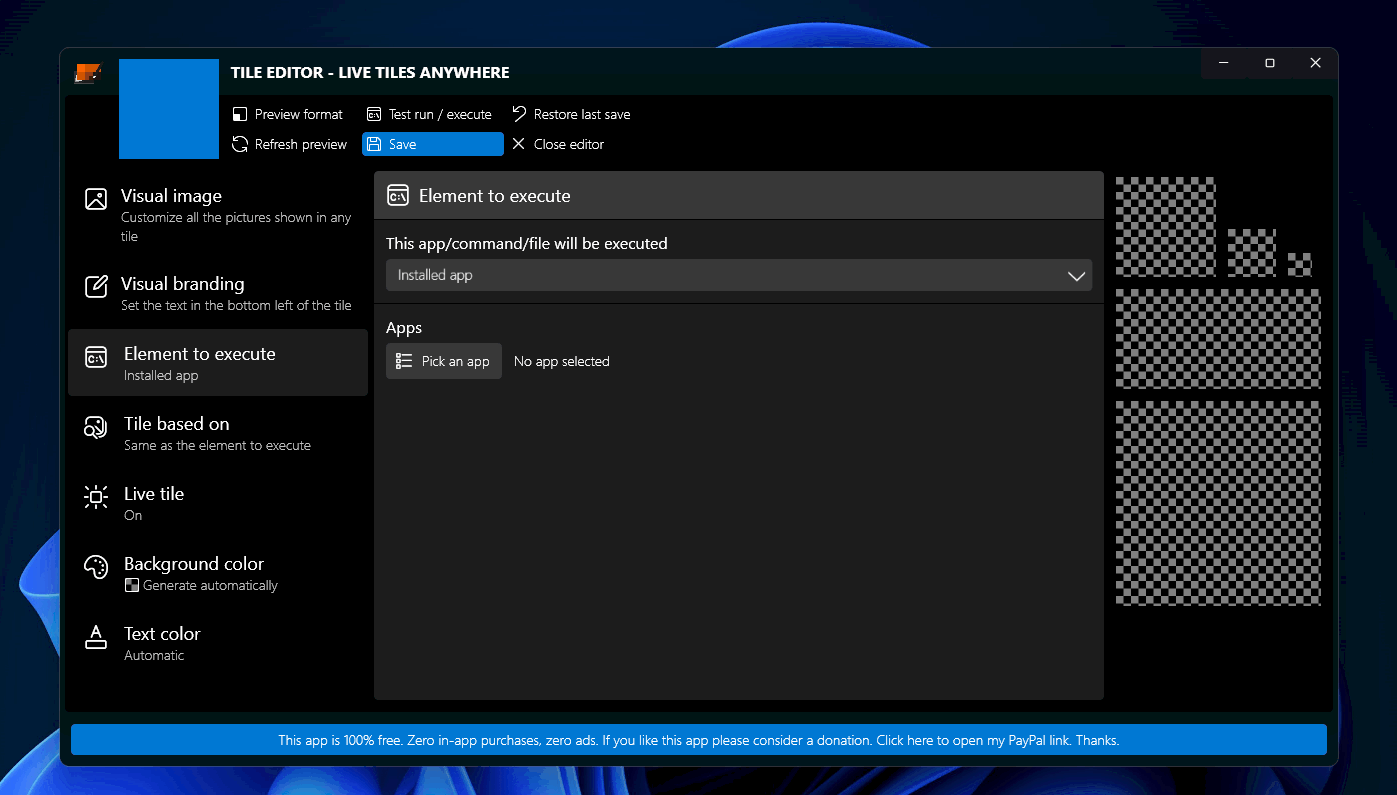
Click on Get/Install to download and install the Live Tiles Anywhere application.Now open the Live Tiles Anywhere application on your PC.Head to the Custom Tiles section in the application, and click on Create a new custom tile. Now, click on the Element to execute button on the left sidebar.
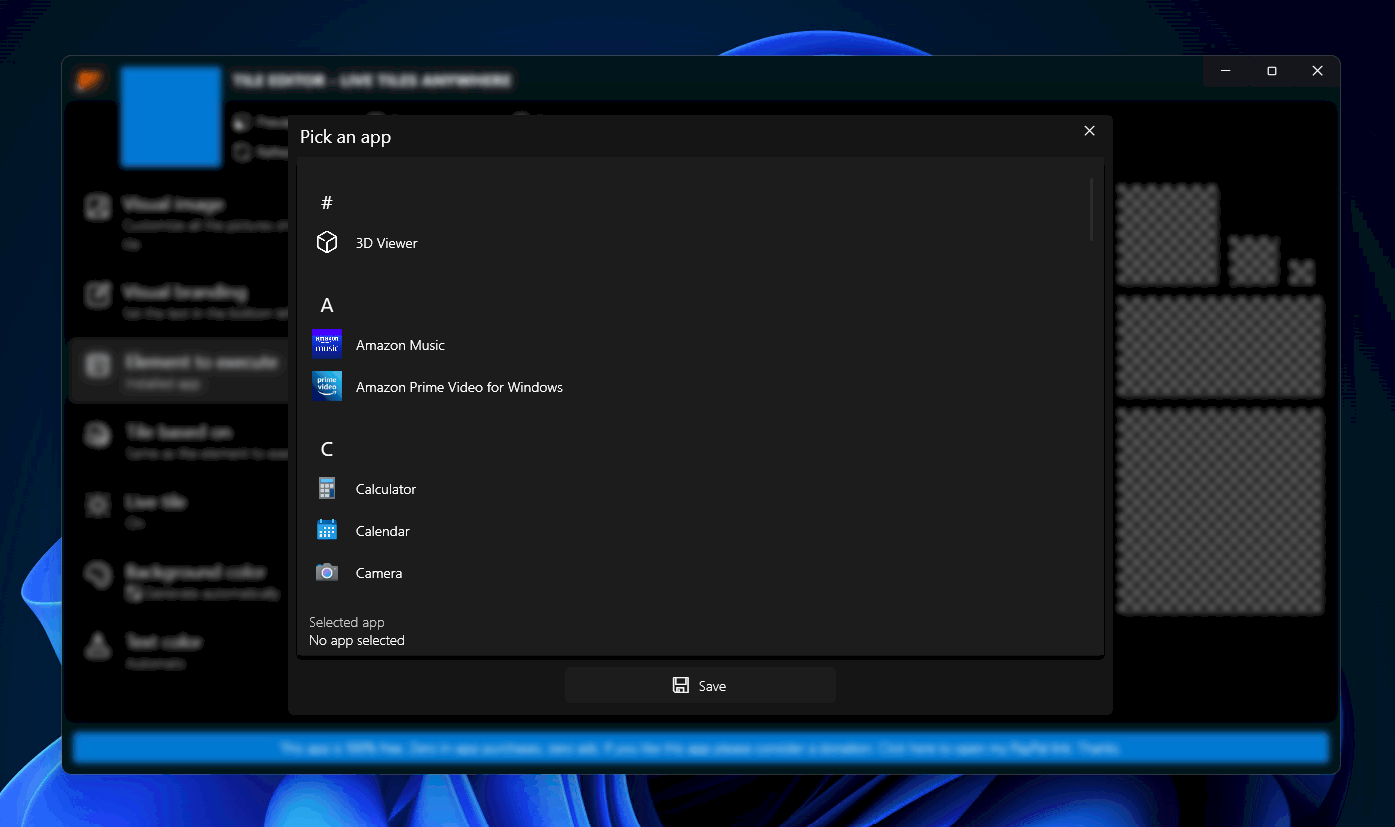
On the right side, click on the drop-down menu saying Do nothing. You will see three options- Do nothing, Installed app, and Program/File/URL/Protocol.Click on the Installed app option. Now click on Pick an app to select the preferred app.
Now from the list of app, select the app for which you want to create the live tile and then click on Save.
Next, you will see customization options like text color, background color, visual image, visual branding, and others. Customize it as per your preference, and then click on Save.
Click on Save and close to make the changes.You will now have to pin the tile to the start. To do so, select the tile you created, right-click on it, and then click on Pin to the Start Menu. When prompted to confirm, click on Yes. If you want to create a desktop icon of the tile, then right-click on the tile you created, and then from the context menu, select Create a desktop icon.
Creating Widgets In Windows 11
Live Tiles Anywhere app also allows users to create widgets in Windows 10. You can create widgets for the live tiles you have created using the Live Tiles Anywhere application. To do so, follow the steps given below-
In the Start Menu, search for the Live Tiles Anywhere app and open the first result that opens up.Under the Custom Tiles, you will see all the live tiles that you have created.Select the tile for which you want to create the widget. Right-click on it, and then from the menu, click on Create a widget. You can do the same from the All Apps section in the Live Tiles Anywhere app.
The widget will now be available on the Desktop, and you will be able to access the app directly from the Desktop. RELATED GUIDES:
How to Fix Windows 11 Widgets Not Working ProperlyHow To Calibrate Monitor Screen on Windows 11 PCHow To Get Back The Old Context Menus On Windows 11
Final Words
This is how you can create live tiles and widgets in Windows 11. The app we are using here is well optimized for Windows 10, and it will take some time for the developers to optimize this app for Windows 11.
How Do I Create Widgets In Windows 11?
Windows 11 brought a new widgets section to the operating system. This option opens up a new pane where you can add widgets customize them and much more. You can also use the Live Tiles Anywhere app on Windows 11 to create widgets of the live tiles you have created. You can follow the steps given in this article to create widgets and customize them using the Live Tiles Anywhere in Windows 11.
Δ


