Setup and use Guided Access on iOS Devices
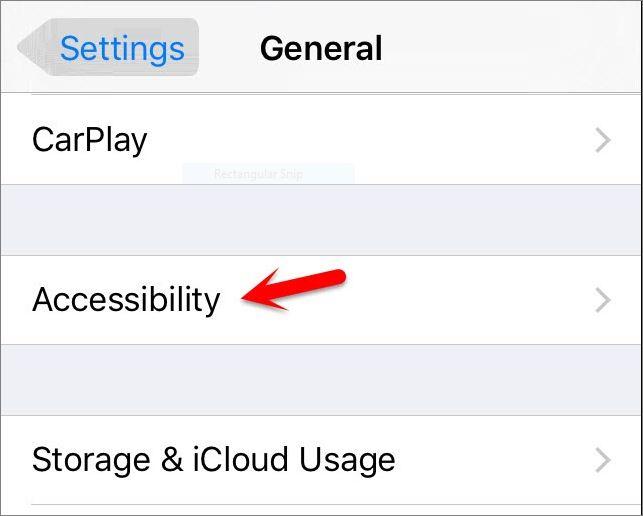
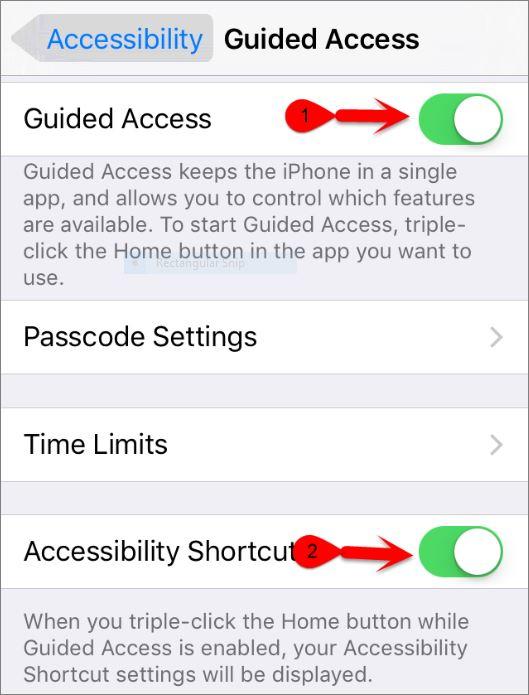
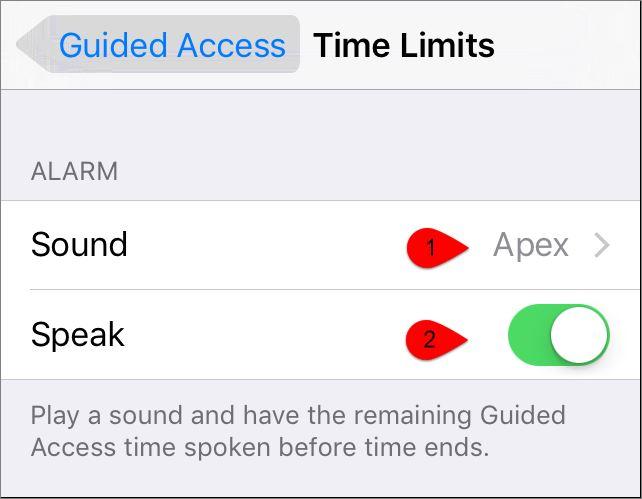
Note: You can enable, setup and use guided access also on iPhone, iPad or iPod touch the same like steps below. Step #1. Go to Settings > General > then tap on Accessibility. Step #2. Scroll down to Guided Access then taps on it. Step #3. first, turn on Guided Access and Accessibility Shortcut, to create or enable shortcut for Guided Access. Step #4. Now tap on Passcode Settings then set a passcode for guided access just by tapping on Set Guided Access Passcode > Enter a Passcode, to use the code when it’s enabled. Note: You can enter 4 or 6 Digit numeric code, it depend on you device passcode. If you set your device 6 digits numeric code, so you can only enter 6 digits numeric code to guided access passcode. or if you set device 4 digits numeric code so you can only enter 4 digits numeric code to guided passcode, change you device passcode to change the guided access passcode. If you don’t know to set the code to your device, then check this article how to Set a passcode to your iDevice or android device? only one thing more you need to remember if your device has the Touch ID, so you can set your Touch ID to guided access also if you want. and you can’t set Custom alphanumeric code. only and only you can set 4 or 6 digits numeric codes or Touch ID (if it’s available) to set the guided access passcode. Step #5. tap on Time Limits then select the Sound and turn on Speak feature to access time spoken before time ends.
How to Use Guided Access to Restrict an App
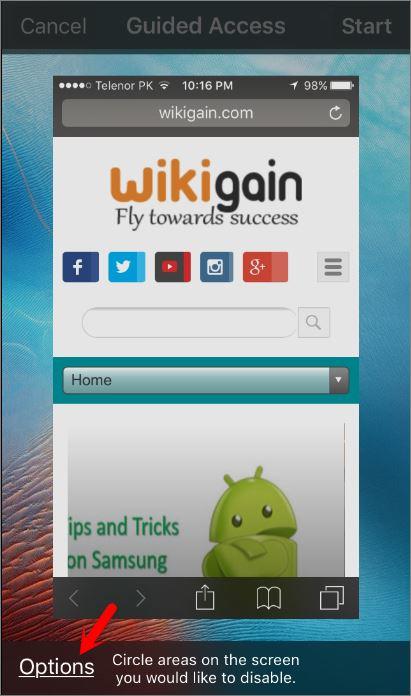
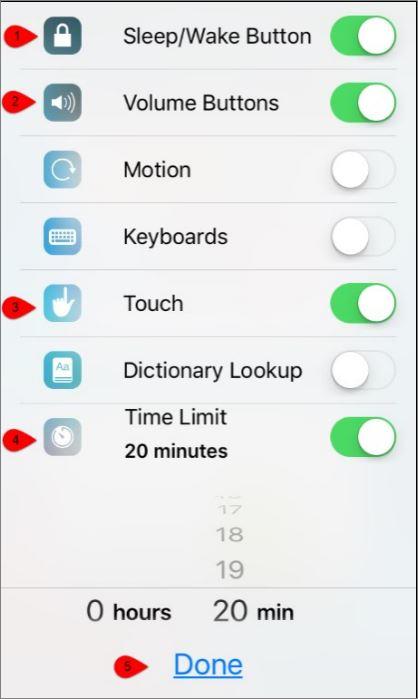
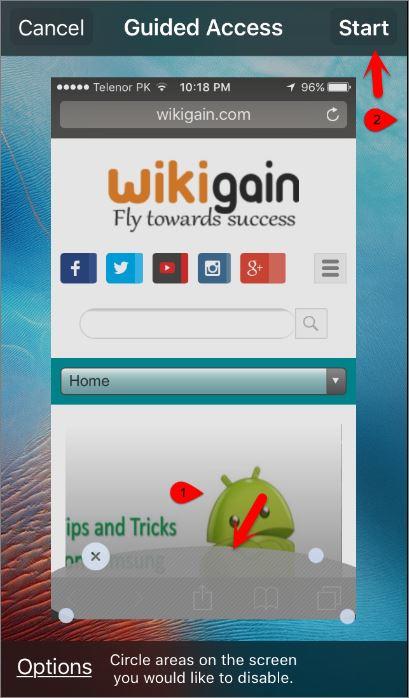
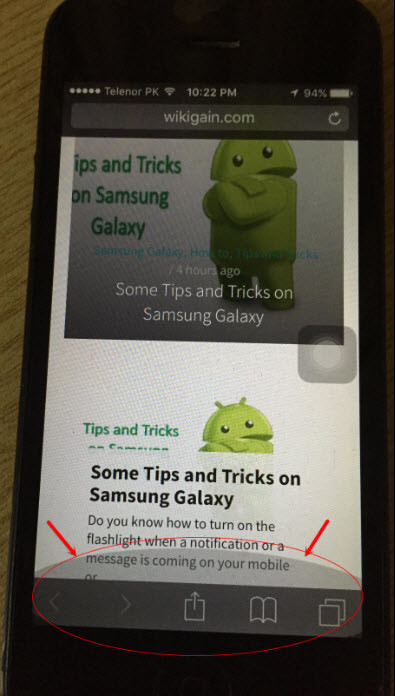
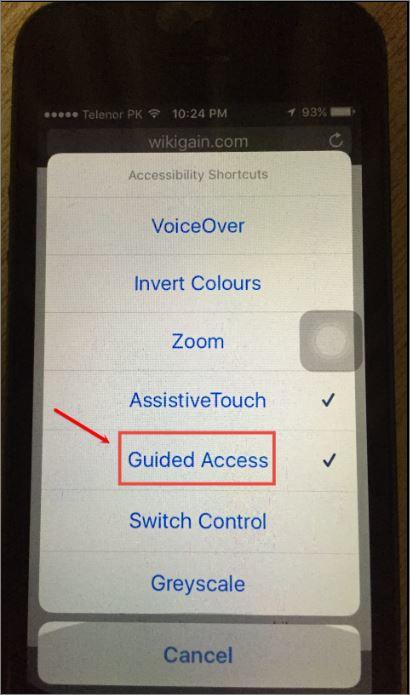
Step #1. Open or Launch the app you want to be guided. Step #2. Triple-click the Home button, to list the shortcuts then tap on the Guided access from the list. Step #3. Now before to Start guided access session, you need to customise your settings on it, so tap on Options. Step #4. From here you can access the user deny or access the following features. enable or disable the features as your need, and after choosing which feature get access and which feature get deny when the guided access session starts, tap on Done. Step #5. If you have chosen touch enabled so from here also you can disable some areas, to do this just Circle areas on the screen you would like to disable, after all, settings and choosing areas to be disabled, tap on Start and from their the guided access session will get started. Step #6. Now you can see that guided access session has been started and I am unable to make any changes on the areas and button that are disabled.
End Guided access session
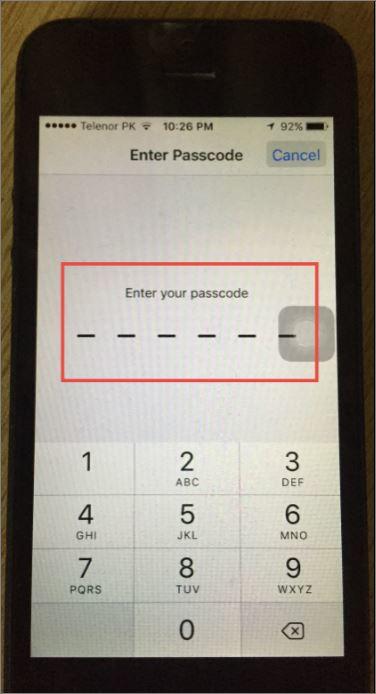
Now you are able to Enable and Setup Guided Access on iOS devices but you must know how to end session this also because in the cause if you didn’t limit time for guided access it will not end automatically but if you limited a spastic time for the session it may disable after the time you adjust for it. Step #1. To end the guided access session triple-click on the home button and tap on Guided Access from the accessibility shortcuts list. Step #2. Enter your passcode to get in the dashboard of guided access. Step #3. Now from here, you can adjust the Options and Resume it again but in the cause, you want to get out of here then tap on End from the left corner.
Another Way to End Guided Access Session
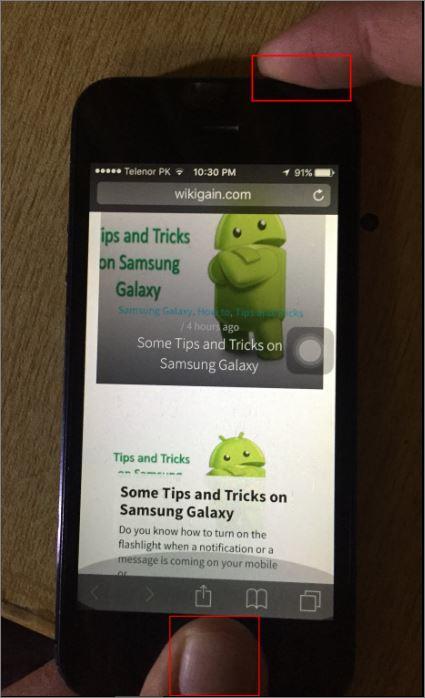
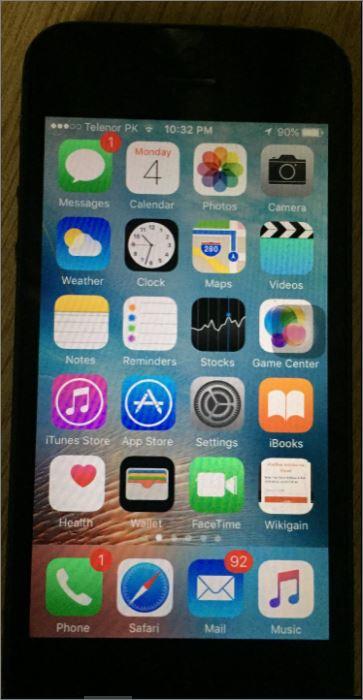
If you know the guided access passcode, use the above steps to say the end to it because it’s for those who forgotten their guided access and they are unable to enter the passcode currently and they are unable to end the session also. Step #1. Press and hold the home and power button for 10 seconds then your device will power off by force. After that turn it on again. Step #2. Wait a little while to turned your device on then slide to the right to unlock and now you can see you’re are free of guided access. don’t show this way to everyone because sometimes you can’t Restrict someone on apps. Also Read: How to Enable and Use Switch Control On iOS Devices? This was all about, how to setup and use guided access on iOS devices to restrict a single app. If you faced any problem tell us below by comment, feel free to tell us. we’re waiting for your suggestion.
