There are several users who wish to remove the password from their Windows 10 PC. Thus, here we are with some of the best methods which you can use to remove the password from your Windows 10 PC. Whether you use a local or Microsoft account, you’ll learn how to sign in automatically or remove a login password from a Windows 10 device in this guide. In case, you don’t have the latest version of windows then you can download windows 10 for free.
Method 1: Set up automatic sign-in.
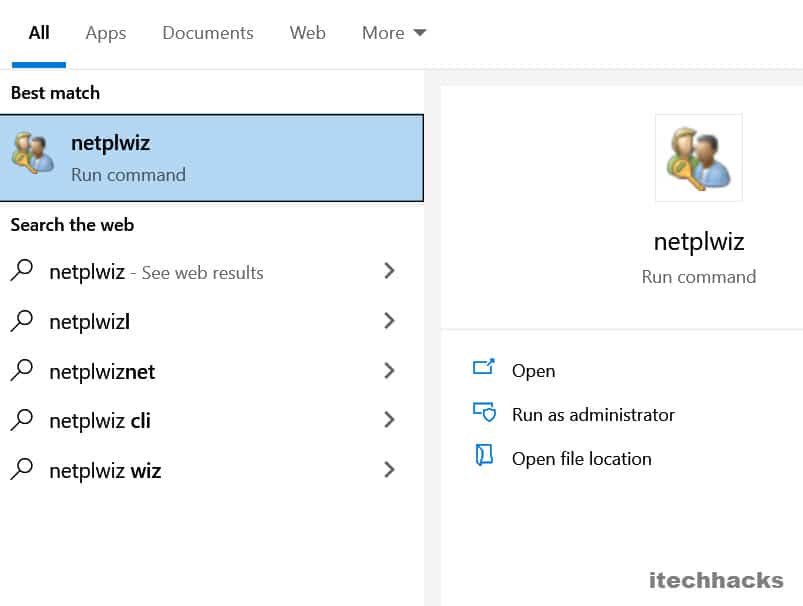
Step 1- In the ‘Start menu, search for ‘netplwiz‘ and open it.
Step 2- Select the account from the list ‘Users for this computer‘ whose password you wish to remove. Step 3- Uncheck the checkbox for the ‘User must enter a user name and password to use this computer option and click on ‘Apply‘ button. Step 4- A dialog box will appear on your screen where you will be asked to enter the username and password of the account to which you wish to set up an automatic sign-in. Enter the required information and click on the ‘OK button. Step 5- Launch ‘Settings‘ on your PC and go to Accounts » Sign-in options. Step 6- Here, click on the downward arrow in the ‘Require sign-in section and select ‘Never‘ from the drop-down box. Now, you will not be required to enter a password every time you boot, restart, or cancel the screen saver on your Windows 10 PC. It will automatically sign you in. ALSO CHECK: How to Get Microsoft Office 365 for Free
Method 2: Use a Local Account.
Step 1- Launch ‘Settings‘ on your Windows 10 PC. Step 2- Go to Accounts » Your info. Here, click on the ‘Sign in with a local account instead‘ option. Step 3- Enter your Microsoft account password and click on the ‘Next‘ option. Step 4- Now, you will be asked to create a username and password for your Local Account. Set a username of your choice and leave the text box for ‘New password‘ and ‘Confirm password‘ blank. Step 5- Click on ‘Next‘ to save and apply the changes which you have just made. Now, you will not be asked to enter a password on your Windows 10 PC.
Method 3: Change your Local Account password.
Step 1- Launch ‘Settings‘ on your Windows 10 PC. Step 2- Go to Accounts » Your info. Here, click on the ‘Password‘ option, under the ‘Manage how you sign in to your device‘ section. Step 3- Click on the ‘Change‘ option and enter your current password in the text box which appears on your screen. Step 4- Now, leave the text box for ‘New password‘ and ‘Confirm password‘ blank and click on the ‘Next button. Step 5- Finally, click on ‘Finish‘ to save and apply the changes which you have just made. The newly changed password will ensure that the previously set password is removed from your PC. ALSO CHECK: How To Fix Windows 10 Search Not Working
Conclusion:
These are some of the best methods which you can use to remove password from Windows 10 PC. However, it is not recommended for users who carry their laptops around or have multiple people using the same desktop.
Q2. How to remove the password on my Windows 10 PC?
There are a couple of methods which you can use to remove password on your Windows 10 PC. Some of the most useful methods are listed above in detail.
Q3. Is it possible to enable the password after removing it for Windows 10 PC?
Yes. Enabling the password is very easy for Windows 10 PC. Thus, you can enable the password whenever you want. The steps for removing the password on a Windows 10 PC are simple to comprehend and carry out. It’s also not difficult to enable the password on your Windows 10 computer. If we’ve missed any other methods for removing passwords from Windows 10, please let us know in the comments section below.