OS X El Capitan (10.11) is the latest Operation System for Macbooks and iMac. Which gives you simpler, smarter ways to do the things you do most with your Mac. Like working in multiple apps at the same time using Split View. So due to this great OS from apple, many people want to work and feel the OS X Power, and If you also wish to but can’t buy a Macbook or iMac, then you can install Mac OS X El Capitan on your PC. So follow this article step by step and install Mac OS X El Capitan on PC using UniBeast. Check out our Related articles about How to Install OS X
How to Install Mac OS X El Capitan on PC? How to Upgrade Mac OS Yosemite to El Capitan? How to Install Mac OS X El Capitan on VirtualBox? How to Dual Boot Mac OS X El Capitan with Windows 10? How to Install Windows 10 on Mac Using Boot Camp Assistant? How to Install Windows 10 on Mac OS without Boot Camp?
Step #1. Download OS X El Capitan
The full operating system is free to download for anyone who has purchased Mac OS X Snow Leopard, Lion, or Mountain Lion or has a Mac preloaded with OS X Mavericks or Yosemite. So download the OS X from the Mac App Store using your Apple ID on any Mac or functional computer running Mac OS X 10.6.8 or later. No matter if that is virtual or physical.
- Go to Mac App Store. 2. Log in with your Apple ID. 3. Download OS X El Capitan. The install OS X El Capitan application will appear in /Applications.
Step #2. Create Bootable USB Installer for Mac Using UniBeast
In this step, you have to create a bootable USB installer for Mac using UniBeast. This step will help you to Boot with the USB installer and create a partition for mac and finally installs the Mac from the USB Installer to OS X Extended (Journaled) partition. It’s a bit long, so due to this, we have managed another article for it check the article and follow step by step the article to bootable create USB Installer. Check out the link below for that article.
How to Create Bootable USB Installer for Mac Using UniBeast?
Step #3. Setup your motherboard’s BIOS or UEFI
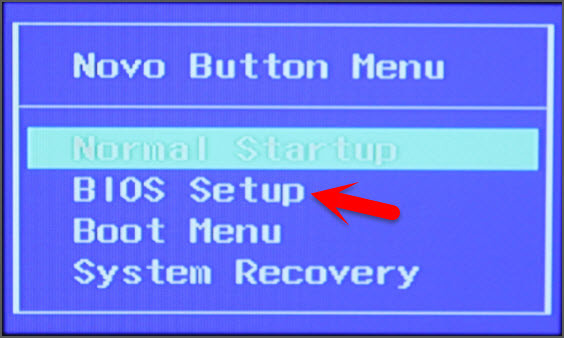
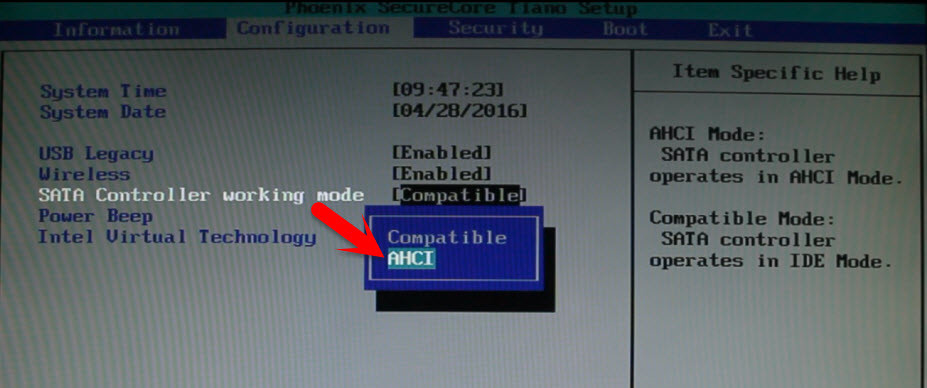
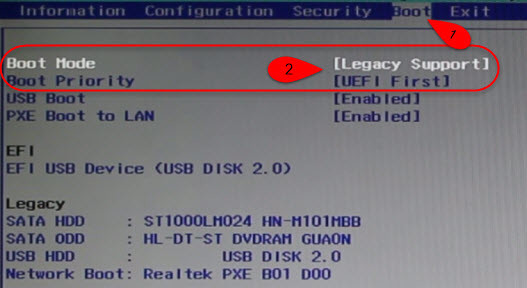
Now after downloading Mac OS X El Capitan and creating bootable USB installer for Mac. Then here you will need to setup parts of your motherboard’s BIOS or UEFI. This step will let and make the USB installer to Boot into Clover Menu. #1. Press the boot Menu Button from your keyboard(F12, F10, F8, F2) depending on your System, if you can’t find then do a google search, and Choose BIOS Setup from the menu. #2. Now from Bios Set The SATA Controller Mode to (AHCI). #3. Then Go to Boot Label and Set the Boot Mode to (Legacy Support) and Set the Boot Priority to (UEFI First) Note: This works great on Lenovo based Computer. And this may not work for any other systems. So due to this, we highly recommend you to do the below guides for your system.
Step #4. Boot into UniBeast
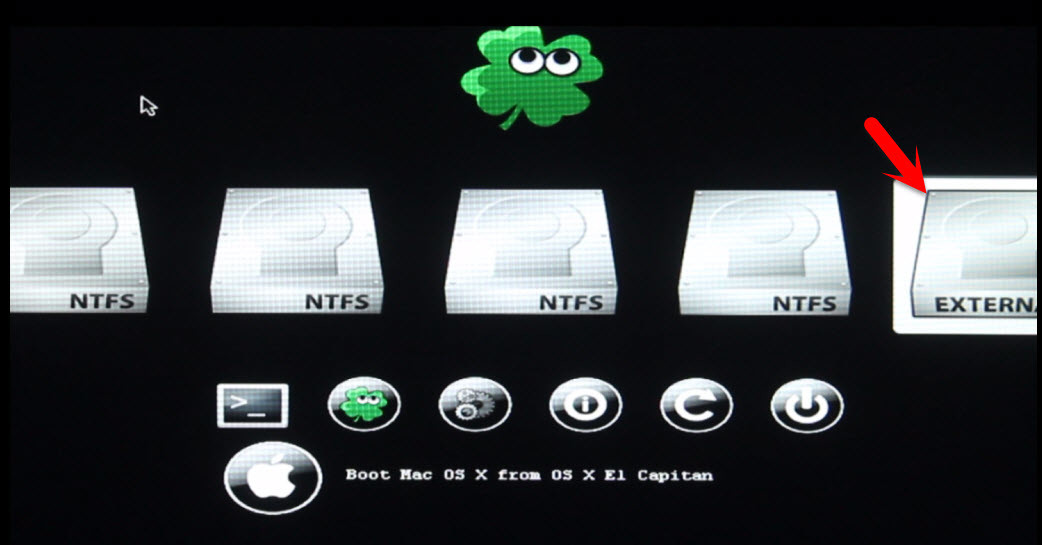
After you get into Clover Menu then if your system has full intel supported then select the Bootable USB Installer. But if that didn’t work, then you need to enter boot flag for your system, in order to boot into UniBeast. #1. So do this firstly navigate to the (options) with arrow buttons keys. #2. From the list select (Boot Args: dart=0) and enter your boot flag. My system is Lenovo Z50-70, so (nv_disbale=1) is the boot flag for my system, in order to boot in. Then select return and hit enter. #3. Now from Clover boot menu, select the bootable USB Installer (External) and hit enter.
Step #5. Choose Your Language for Mac OS X El Capitan
#1. Now after Booting successfully with the boot flag. So USB installer should take you to choose Language page, then Select your Language for El Capitan and click on the Arrow button to go forward. #2. Now click Continue > Agree (Terms of the Software License Agreement).
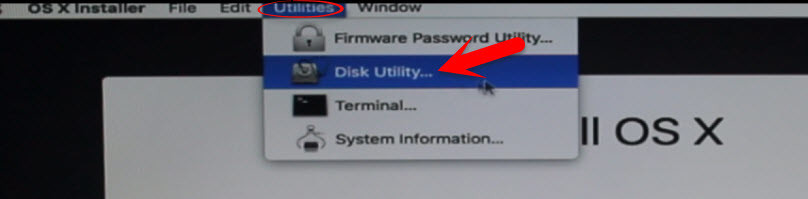
Step #6. Create Partition For El Capitan with Disk Utility
#1. So after you have chosen your language, then you should partition a disk for OS X El Capitan. This step will help you to install OS X El Capitan from the USB installer to the disk. So here to partition a Disk for El Capitan. So Now click on Utilities > Disk Utility. #2. Now select a free empty partition or create a new partition and go to Erase section. Type your Disk Name for El Capitan, then select the format type to “OS X Extended (Journaled)” and click on Erase button.
Step #7. Install OS X El Capitan on Created Partition in Step 6
#1. Choose the Partition that you created in Step 6 and click on Continue. #2. Now, wait for the USB Installer to install OS X El Capitan on the disk partition that you created in step 6, and it will automatically restart after 10 Seconds, or you can do it manually.
Step #8. Perform a clean installation and Setup Your Mac OS X El Capitan on PC
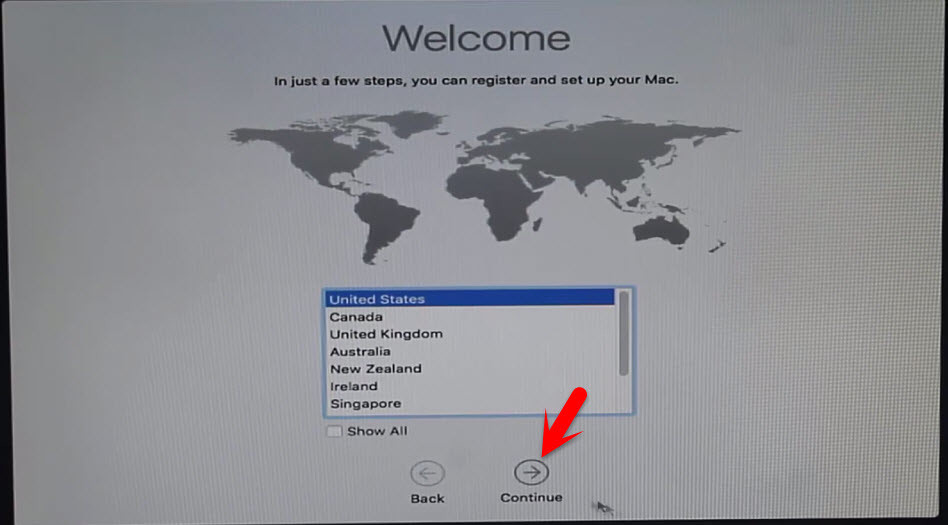
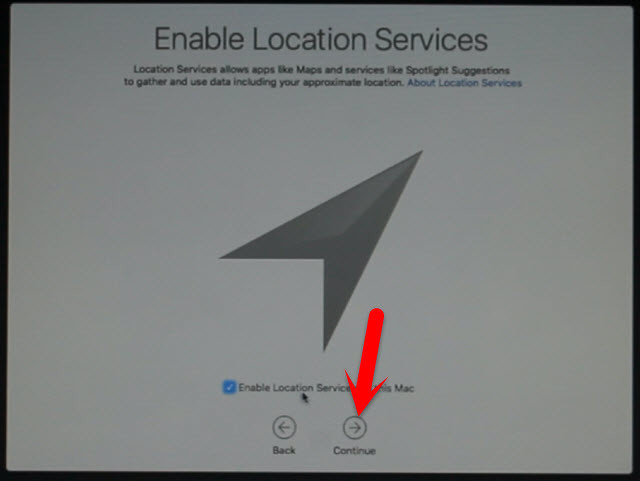
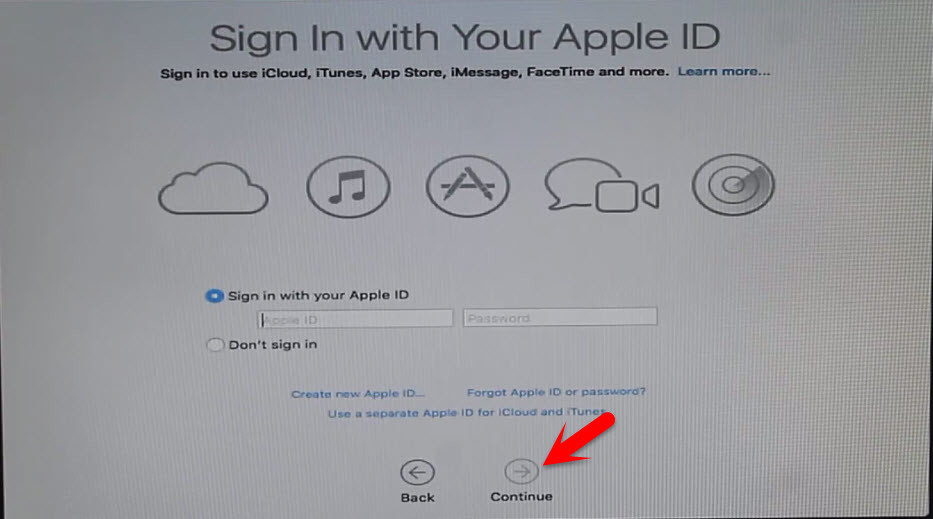
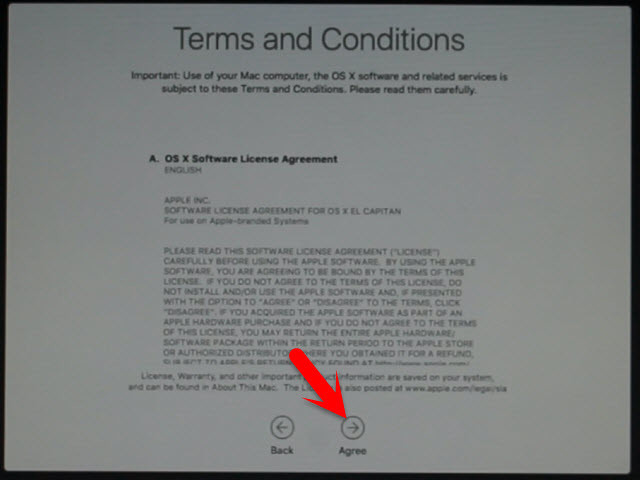
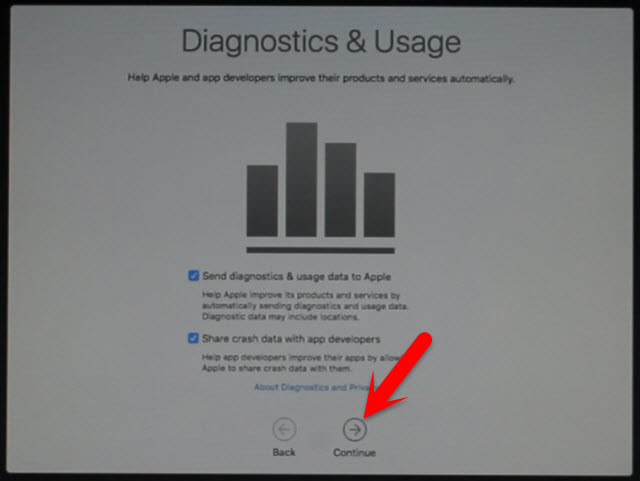
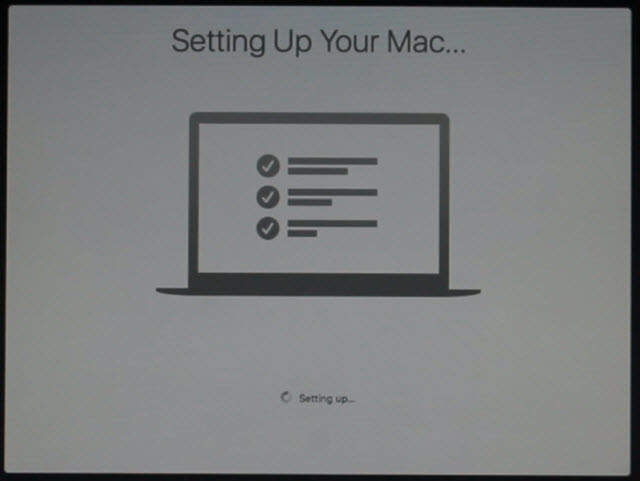
So after your PC restarted then this time boot from the partitioned disk that you created in step 6, not from the USB installer. And after booting from the disk then here you will need to perform a clean installation and setup your Mac OS X El Capitan. #1. Choose your country and click continue. #2. Choose a keyboard Layout and click continue. #3. Now select your method to transfer information to this mac and click continue. #4. Enable location services and click continue. #5. Sign in with your apple id and click continue. If you don’t have one, then create an Apple ID by this article or choose Don’t sign in. #6. Agree to the Terms and conditions. #7. Fill out the Full name, Account name, Password, Hint and check the box of Set time zone based on Current location. Then finally click Continue to create your user account for Mac OS X El Capitan, that installed on your PC. #8. Select the options for Diagnostics & usage. #9. Wait a little while to Setting Up Your Mac.
Finish Installation
After performing a clean installation and Set upping your Mac OS X El Capitan on PC using UniBeast then you should see your final result. Related Search:
Mac OS X El Capitan tutorial UniBeast El Capitan Install Mac OS X El Capitan On PC Hackintosh El Capitan without mac install el Capitan on PC Hackintosh El Capitan AMD Hackintosh El Capitan upgrade Install OS X El Capitan On PC Using UniBeast
This was all about, how to install Mac OS X El Capitan on PC using UniBeast. If you faced any problem, tell us below by comment, feel free to tell us. We’re waiting for your suggestion.