Check out our Related articles about How to Install OS X
How to Install Mac OS X El Capitan on PC Using Unibeast? How to Upgrade Mac OS Yosemite to El Capitan? How to Install Mac OS X El Capitan on VirtualBox? How to Dual Boot Mac OS X El Capitan with Windows 10? How to Install Windows 10 on Mac Using Boot Camp Assistant? How to Install Windows 10 on Mac OS without Boot Camp?
How to Install Mac OS X El Capitan On PC
Step #1. Create Bootable USB Installer for Mac on Windows 10
The first step you should take is formatting your hard drive before you install El Capitan on Mac. And create OS X 10.11 El Capitan bootable USB Installer on PC or create bootable USB for Mac on Windows, before skipping this step. If you prefer doing install OS X El Captain on PC, then you must do step 1 carefully because it’s the primary step that you begin to process. Click on the Heading Link, go and follow step by step to create bootable USB installer for Mac on Windows.
Step #2. Boot with Your bootable USB Installer
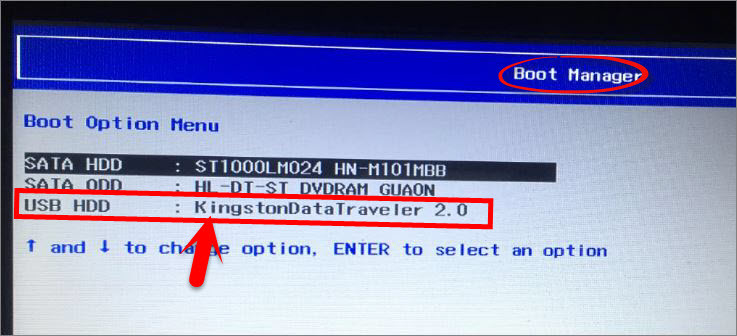
Now plug your bootable USB Installer into your PC that want to install Mac OS X El Capitan on it, then press the boot Menu Button from your keyboard(F12, F10, F8, F2) depending on your System, it can find then do a Google search, after that enter Boot Manager then select the bootable USB Boot Installer and hit enter.
Step #3. Boot with Your System Boot Flag
Now Select “hd (0.2) (10.11) El Pwn Version” And Hit enter to go forward. If it doesn’t boot directly, then use some boot flags to boot (Boot Flag’s are under the shot).
Boot flag’s
- ALL AMD Boot flag’s:
- /amd -v : /amd1 -v : /amd2 -v : /amd64 -v : /amd32 -v ( this is actually 64 bit kernel ) To use hp kernel : /hp or /hp1 To use haswell kernel : /haswell For Nvidia Graphics ( GTX 600 series – Titan Series ) nv_disable=1. After boot installs Nvidia Cuda drivers for Mac manually. If it doesn’t boot try to combine these boot args: npci=0x3000 , npci=0x2000 , USBBusFix=Yes , cpus=1 , PCIRootUID=1, IGPEnabler=Yes or IGPEnabler=No, GraphicsEnabler=Yes or GraphicsEnabler=No If the list above doesn’t work comment us below or do a google search for your problem.
Step #4. Choose Your Language for Mac OS X El Capitan
Now after Booting successfully with the boot flag. So USB installer should take you to choose Language page, then Select your Language for El Capitan and click on the Arrow button to go forward.
Step #5. Create Partition for El Capitan with Disk Utility
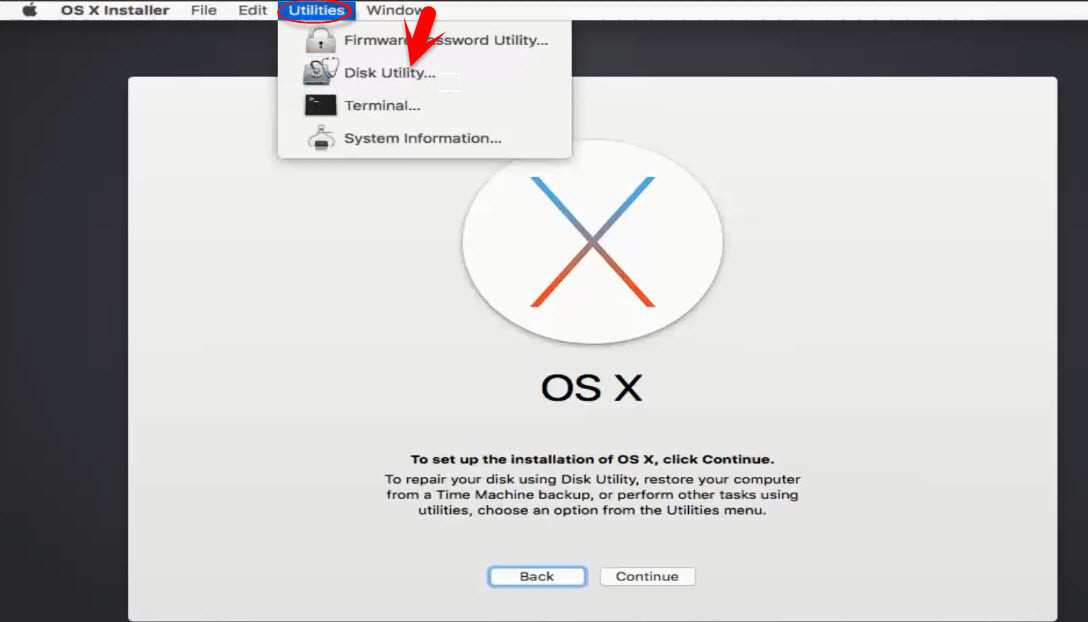
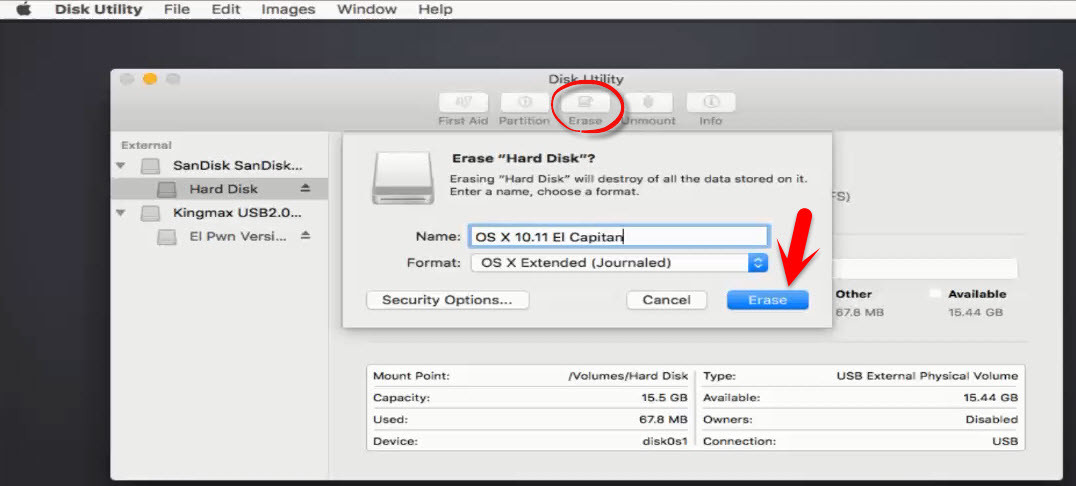
Here you will need to partition a Disk for El Capitan. So Now Click on Utilities > Disk Utility. Now select a free empty partition or create a new partition and go to Erase section. Type your Disk Name for El Capitan, then select the format type to “OS X Extended (Journaled)” and click on Erase button.
Step #6. Install OS X El Capitan on Created Partition in Step
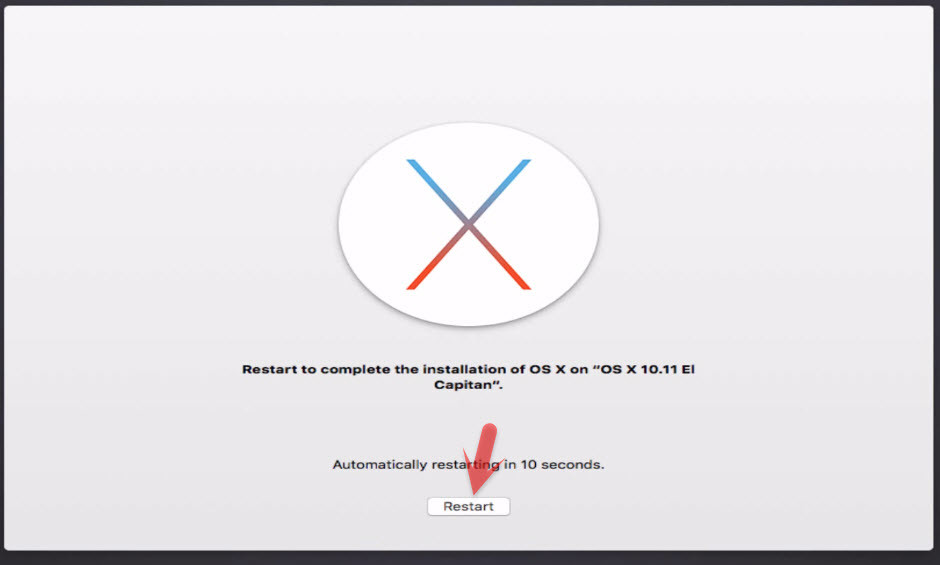
So after Creating an “OS X Extended (Journaled)” Partition for Mac OS X El Capitan, then close disk utility then click on Continue > Agree (Terms of the Software License Agreement). Choose the Partition that you created in Step #5 and click on Continue. After you click on, continue then the USB Installer will install OS X El Capitan on the disk partition that you created in step #5, and it will automatically restart after 10 Seconds, or you can do it manually.
Step #7. Perform a clean installation and setup Your Mac OS X El Capitan on PC
So after your PC automatically restarted. Then go to Boot Manager and boot from Bootable USB Installer then Unplug or Remove the Bootable USB Install from your PC. After doing these then Select the OS X Extended (Journaled) partition that you created in Step #5 and hit enter. Now follow the article below to Perform a clean installation of El Capitan or Set Up Mac OS X El Capitan on PC.
How to Perform A Clean Installation of Mac OS El Capitan
Done Installation
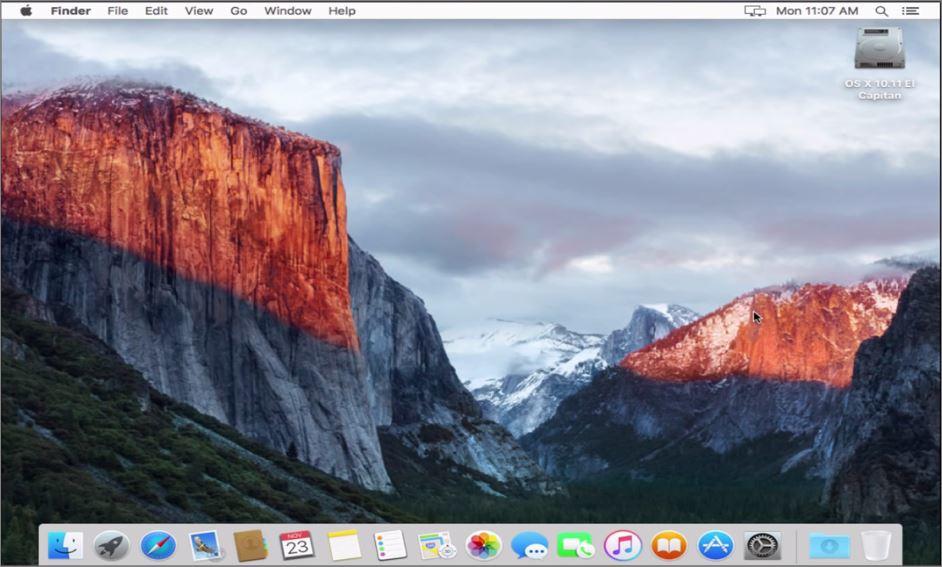
After performing a clean installation and Set up your Mac OS X El Capitan on PC then you should see your final result. Also Read: How to Install Mac OS X El Capitan on VirtualBox? This was all about, how to install Mac OS X El Capitan on PC. If you faced any problem, tell us below by comment, feel free to tell us. We’re waiting for your suggestion.
