What is a Dual Boot?
Dual-booting is the act of installing multiple operating systems on a computer and being able to choose which one to boot. The term dual-booting refers to the standard configuration of two operating systems. It means when we install two operating systems on a single machine. Sometimes it’s called Multi-boot or dual boot as well. If you install and use three operating systems like Mac, Windows, and Kali Linux on a single machine then in this cause, it called triple boot. Now that you have understood what is dual boot, so let dual boot Windows 10 and Mac OS X El Capitan on PC.
Dual Boot Windows 10 and Mac OS X El Capitan on PC
What am I Going to Do in this Article?
Before to start dual booting, you must know about this article, that from where I am going to start, from where I am going to work and how do I finish. Firstly, I have done the requirement that I said above. Then I am going to install Mac OS X El Capitan first and then Windows 10 at last. Please remember about my partitions that may Hard disk drive is empty, and I will partition it for Mac and Windows in the duration of installing Mac OS X El Capitan. So don’t forget to save your file before formatting you HHD or SSD.
Requirement
Bootable USB Installer for Mac OS X El Captain with UniBeast. If you don’t have one, then follow the article to create a USB Installer for Mac OS X El Capitan Using UniBeast. Bootable USB For Windows 10. Follow the article on how to build a bootable USB for Windows. Create two free empty partitions for Mac OS X El Capitan and Windows 10. A PC (Laptop or Desktop) with full Intel supported to install and Support Mac OS X El Captain and Windows 10. Extra accessories like mouse, Keyboard and much more, because of Mac OS X El Capitan may not identify your laptop’s keyboard or mouse until you didn’t install the drive Separately.
Installing Mac OS X El Capitan
As I said above, first, I am going to install OS X because if we install Windows 10 first, it might create problems for us while installing Mac OS X El Capitan. Sometimes the Windows doesn’t let us partition a free and empty partition for Mac. As I try and I faced this problem, but you can work yourself also, and it may not create problems with your HDD, it might be different from mine one. So if you’re following these steps, then you must install Mac OS X El Capitan first.
#1. Create Bootable USB Installer for Mac Using UniBeast
In the first step, as I mentioned above, that you have to create a bootable USB installer for Mac using UniBeast. This move will help you to Boot with the USB driver and create a partition for Mac and finally installs the Mac from the USB Installer to OS X Extended (Journaled) partition. It’s a bit long, So due to this, we have managed another article for it, check the item and follow step by step the material to create bootable USB Installer. See the link below for that section.
How to Create Bootable USB Installer for Mac Using UniBeast?
#2. Setup Parts of Your Motherboard’s BIOS or UEFI
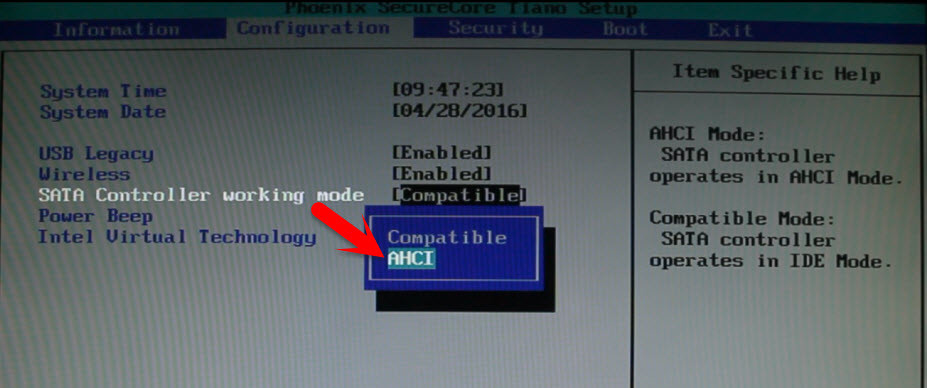
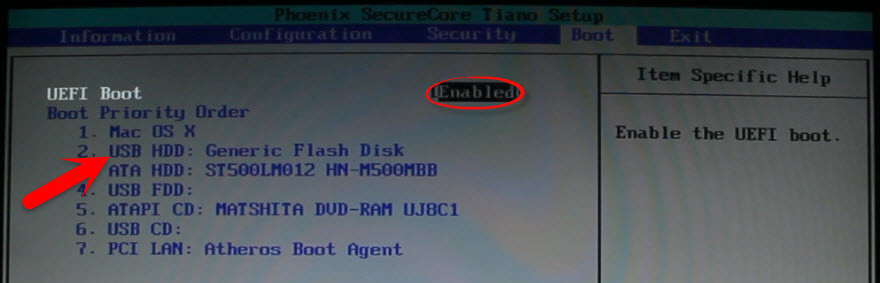
Now after downloading Mac OS X El Capitan and creating bootable USB installer for Mac. Then here you will need to set up parts of your motherboard’s BIOS or UEFI. This step will let and make the USB installer to Boot into Clover Menu. #1. Press the BIOS Menu Button from your keyboard(F12, F10, F8, F2) depending on your System, if you can’t find then do a Google search or comment as below your system details. #2. Now from BIOS, Set The SATA Controller working Mode to (AHCI). #3. Then Go to Boot Label and Set the UEFI Boot to (Enabled) and Set the Boot Priority Order to (USB HDD) Note: This works great on Lenovo based Computer. And this may not work for any other systems. So due to this, we highly recommend you to do the below guides for your system.
#3. Boot into UniBeast
After you get into Clover Menu then if your system has full intel supported then select the Bootable USB Installer. But if that didn’t work, then you need to enter boot flag for your system to boot into USB Installer. Now from Clover boot menu, select the bootable USB Installer (External) and hit enter.
#4. Choose Your Language for Mac OS X El Capitan
Now after Booting successfully with the boot flag. So USB installer should take you to Language chooser page, then Select your Language for El Capitan and click on the Arrow button to go forward.
#5. Create Partition For El Capitan and Windows 10 with Disk Utility
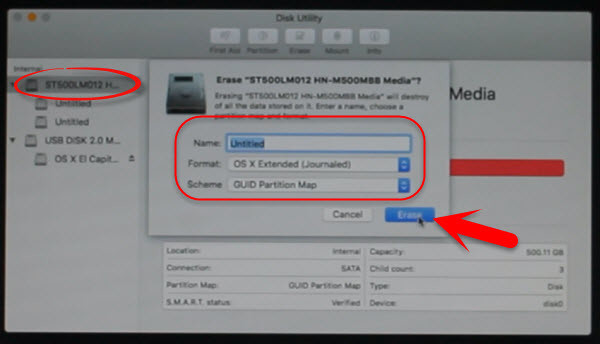
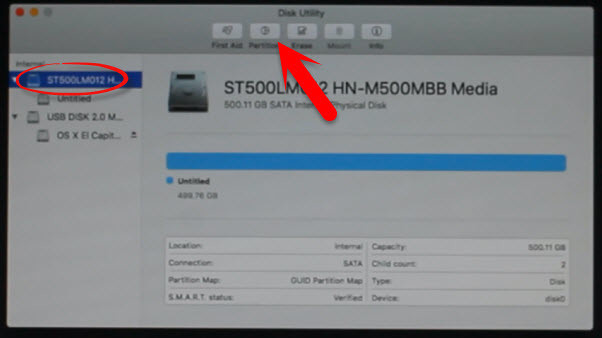
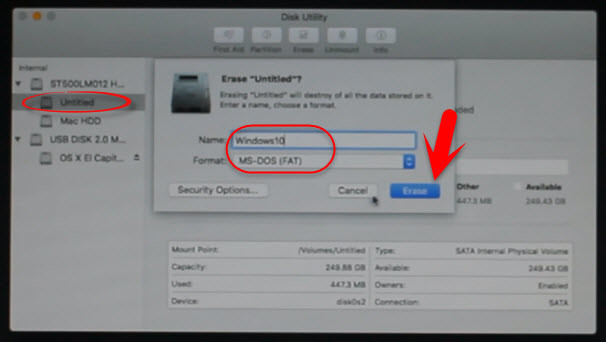
So after you chose your language, then you should partition the disk for OS X El Capitan and Windows 10. This step will help you to install OS X El Capitan from the USB installer to the drive for El Capitan. #1. To partition the Disk for El Capitan. Now click on Utilities > Disk Utility. #2. Now select your hard disk drive and click on erase tab name the disk then choose the format to “OS X Extended (Journaled) “and select the Schema to “GUID Partition Map”. Then your drive will be cleaned and partition for OS X Extended Journaled. #3. To create more partitions, now again select your machine’s hard disk and this time, click on partition tab. #4. Click on the “+” button to create two partitions. After that name the partition Language OS X El Capitan and select the format to OS X Extended (Journaled) then click on Apply button to partition the disk for Mac OS X El Capitan. #5. Wait a while for USB Installer to partition a disk for Mac OS X. Now select the Untitled partition and click on erase tab then Name the partition for Window 10 and choose the format type to MS-DOS (FAT) then click erase button to apply the settings.
Step #6. Install OS X El Capitan on Created Partition
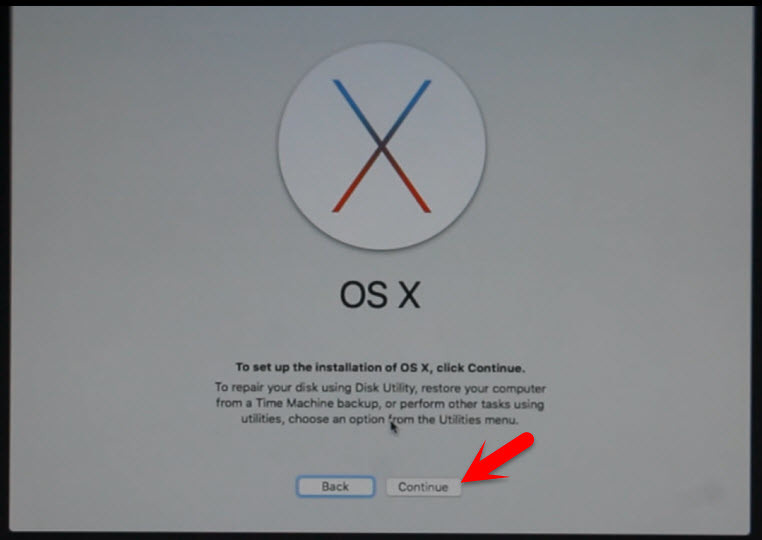
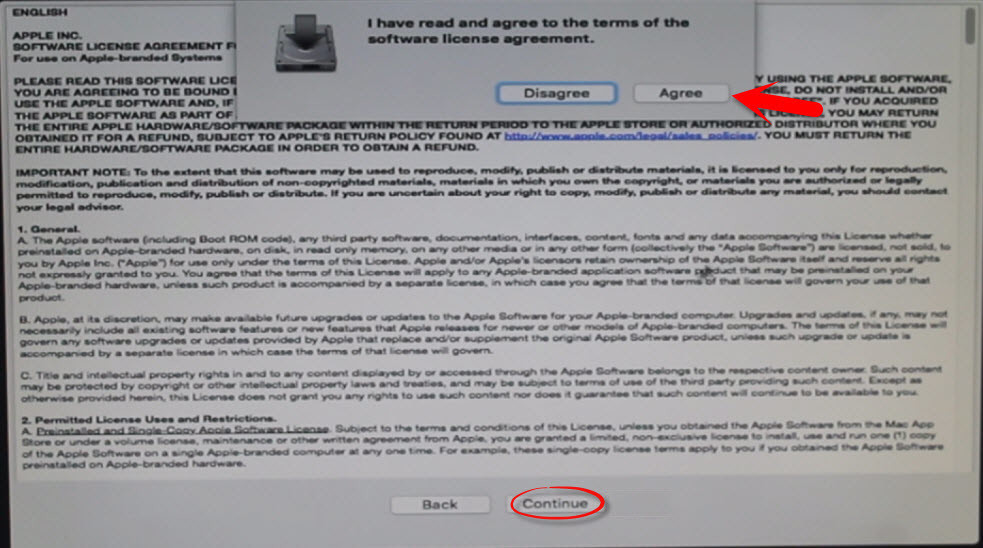
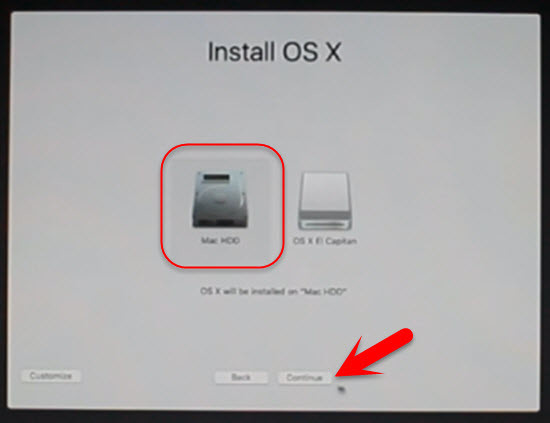
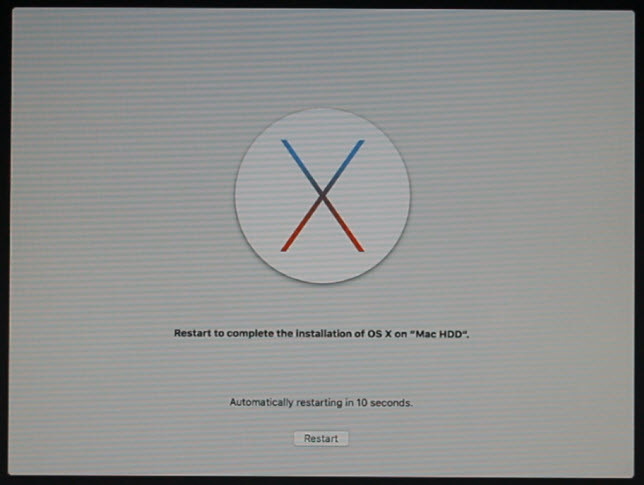
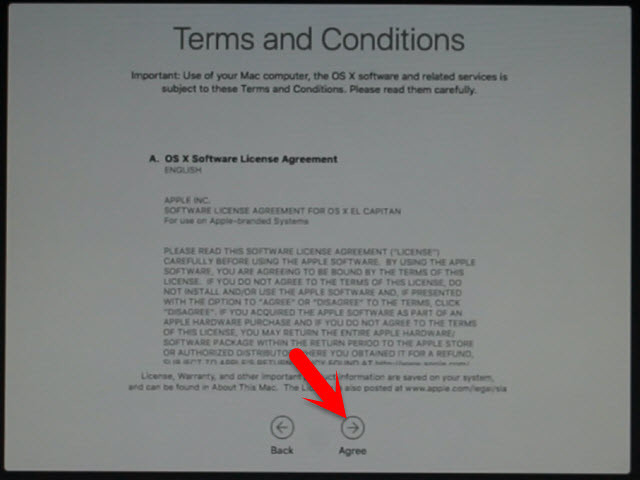
#1. To set up the installation of OS X, Click On Continue. #2. Now click Continue then click Agree to the I have read and agreed to the terms of the software license agreement. #3. On the Install OS X page, select the partition that you created for Mac OS X El Capitan while partitioning for OS X and Windows 10 and finally click on Continue. #4. Now, wait for USB Installer to Install Mac OS X El Capitan from it to the disk that you selected. It will take some time to complete depending on your system. After it is completed, then it will restarts after 10 seconds automatically.
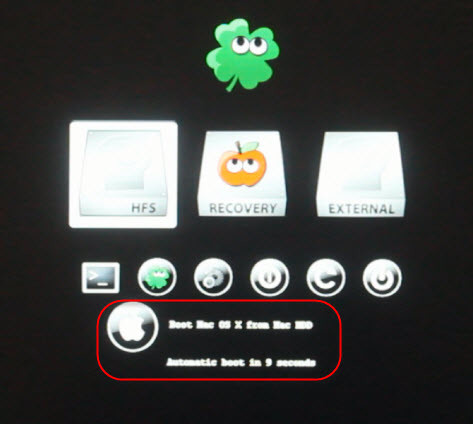
#7. Boot into Mac OS X El Capitan Partition or Disk (HFS)
On the Clover Menu, don’t make any changes because it will automatically boot into the disk that Mac OS X is newly installed. If no then select HFS disk icon that named your Mac HDD.
#8. Perform a clean installation of Mac OS X El Capitan
Now in the previous step, if you have installed OS X El Capitan from the USB Installer to the partition that you created for Mac OS X El Capitan, then here it’s time to step and performing a clean installation of OS X El Capitan. Well, we have another article also this for further information visit the link below to perform a clean installation of Mac OS X El Capitan or keep following this article below to perform a clean installation of OS X.
How to Perform a Clean Installation of Mac OS X El Capitan?
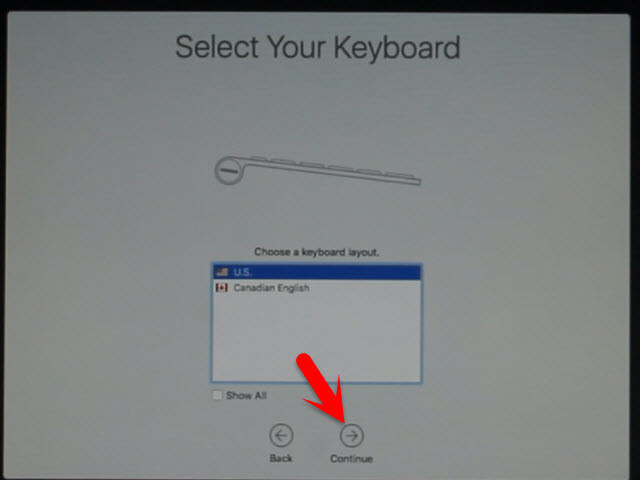
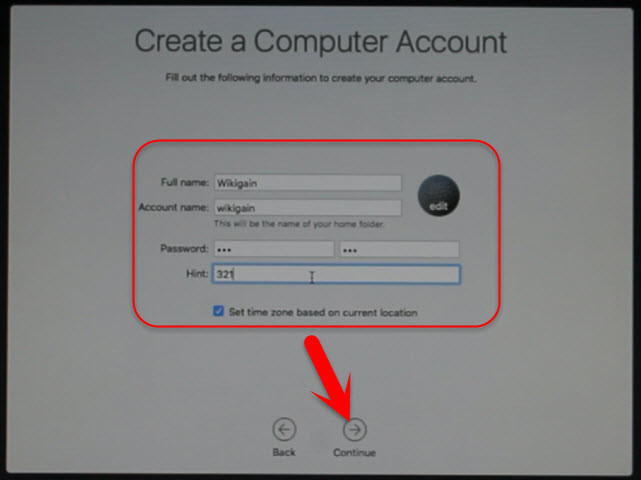
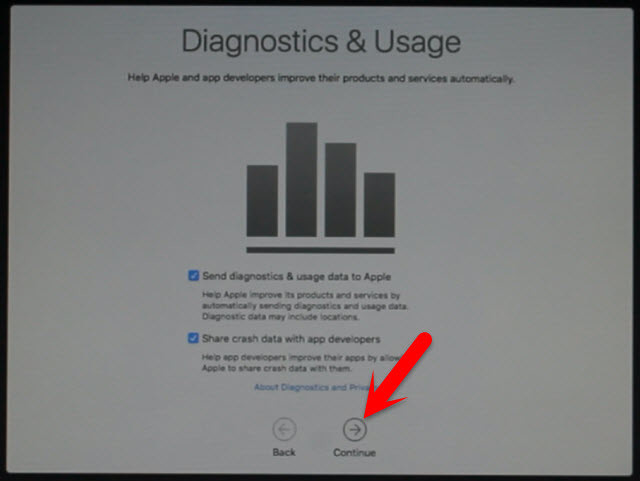
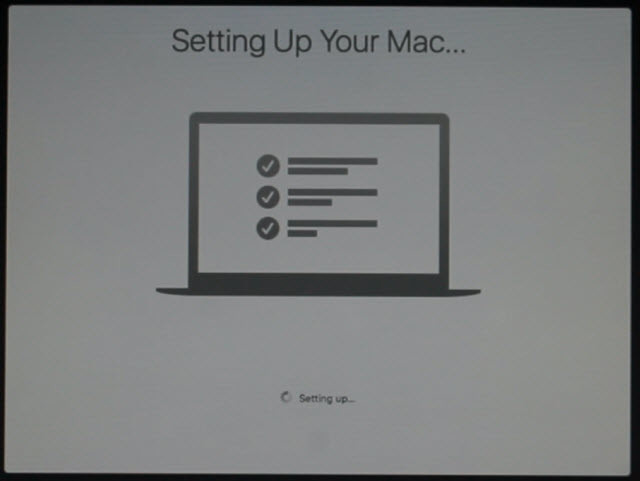
#1. Choose your country and click continue. #2. Choose a keyboard Layout and click continue. #3. Now choose your method to transfer information to this Mac and click continue. #4. Enable location services and click continue. #5. Agree to the Terms and conditions. #6. Fill out the Full name, Account name, Password, Hint and check the box of Set time zone based on Current location. Then finally click Continue to create your user account for Mac OS X El Capitan, which will be installed on your PC. #7. Select the options for Diagnostics & Usage and click Continue. #8. Wait a little while to Setting Up Your Mac. Then it will run on the desktop of OS X.
Finish Installation
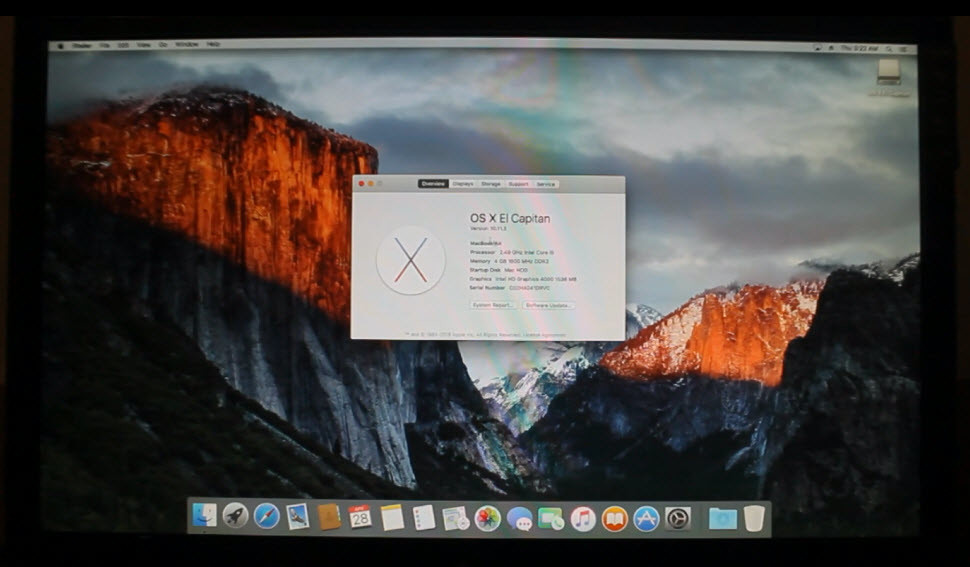
After performing a clean installation and Set up your Mac OS X El Capitan on PC, then you should see your final result.
Installing Windows 10
Now after installing Mac OS X El Capitan on your PC and now you if you have installed it successfully then you’re almost 50% done. Because your PC may support window 10 and it’s easy to install windows. So to complete dual boot Windows 10 and Mac OS X El Capitan on PC then keep following here step by step. If you faced any problem, then please comment us below to solve another problem also.
#1. Create Bootable USB for Windows
As I mentioned in at the requirement section, that you need a bootable USB with Windows 10 or a Windows 10 CD\DVD, to install Windows 10 on your PC and complete your dual booting. If you don’t have Bootable USB with Windows 10 or Windows 10 CD\DVD, then buy one or create a bootable USB for Windows 10 with the help of the article below.
How to Create Bootable USB for Windows.
#2. Setup Parts of Your Motherboard’s BIOS or UEFI
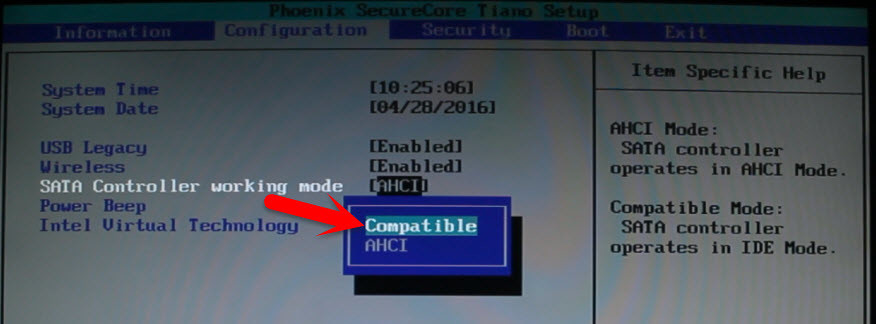
Whenever we want to install Mac OS X El Capitan then we need to make the BIOS Setting for El Capitan to install and So there are the same cause windows, now we have to make the BIOS setting for windows 10 to install it and complete our Dual Booting. #1. Press the BIOS Setup Button from your keyboard(F12, F10, F8, F2) depending on your System, if you can find then do a google search or comment as below your system details. #2. Now from Bios Set The SATA Controller working Mode to (Compatible). #3. Then Go to Boot Label and Set the Boot Mode to (Enabled) and Set the Boot Priority to (USB HDD).
#3. Perform a Clean Installation of Windows 10
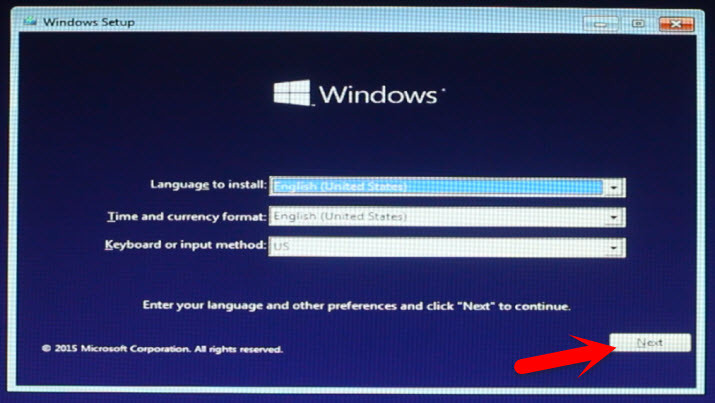
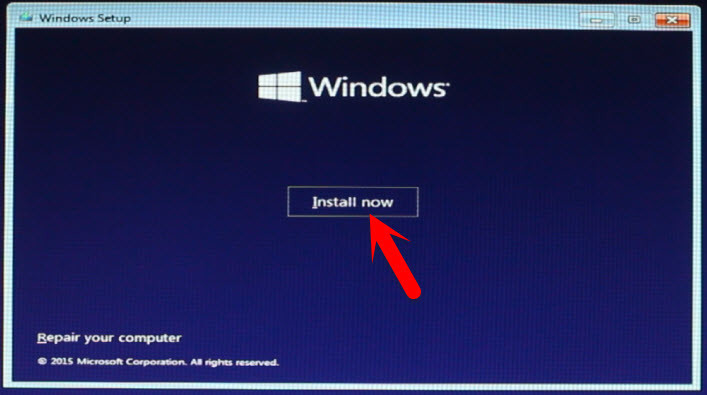
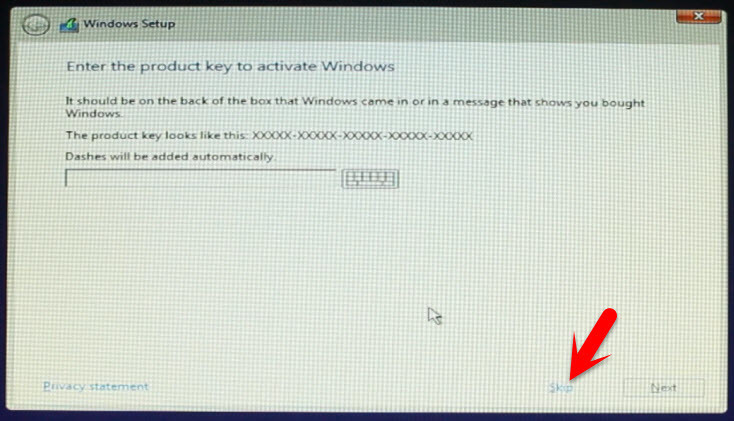
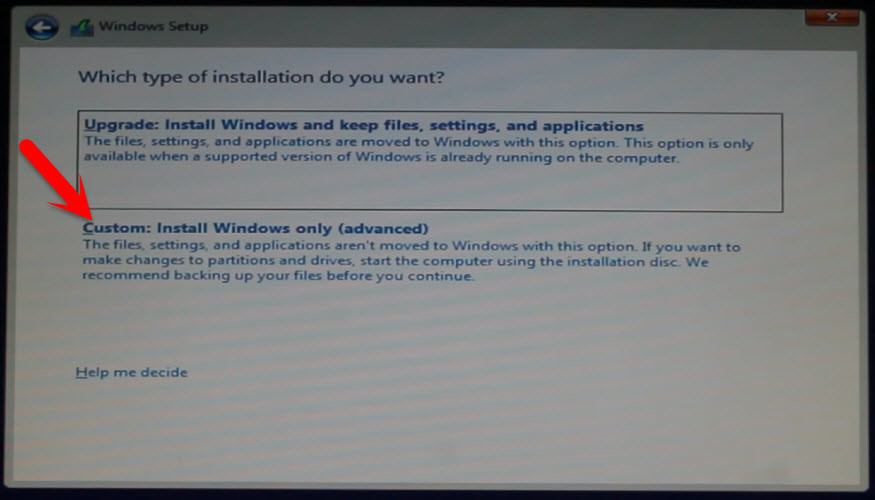
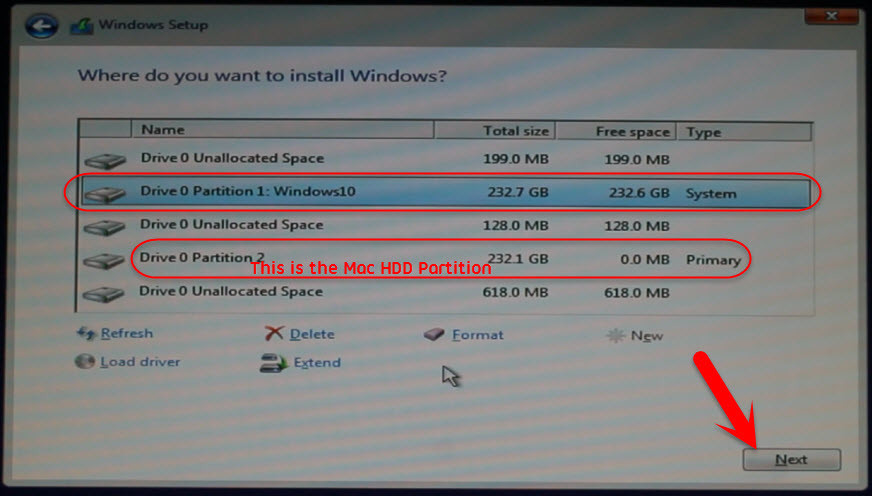
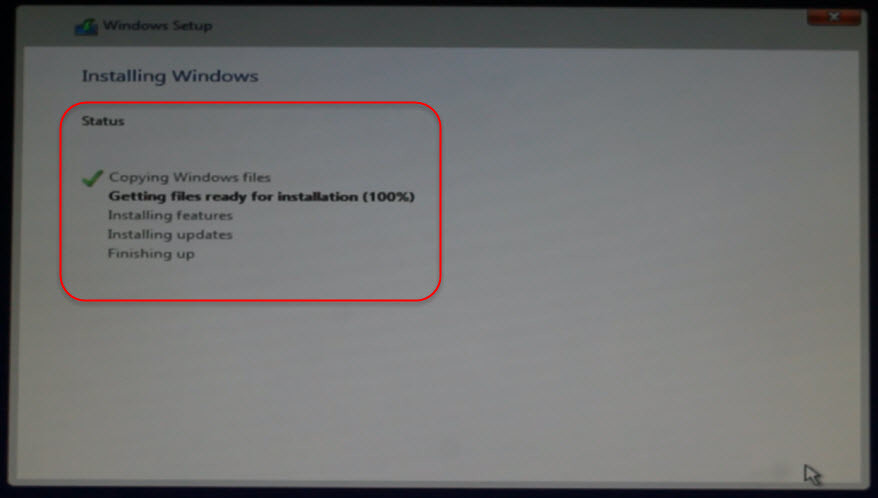
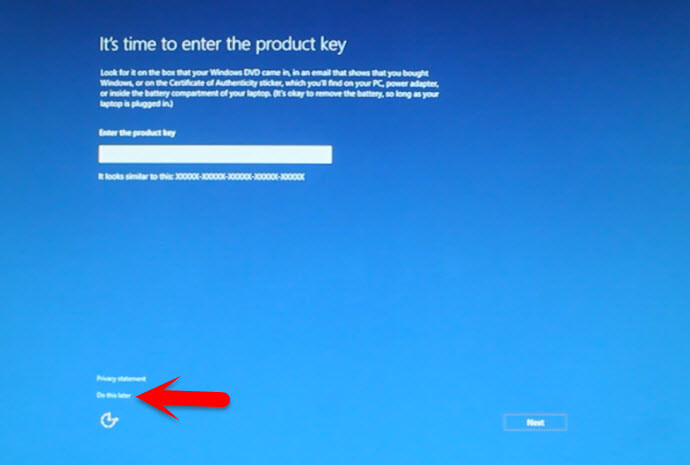
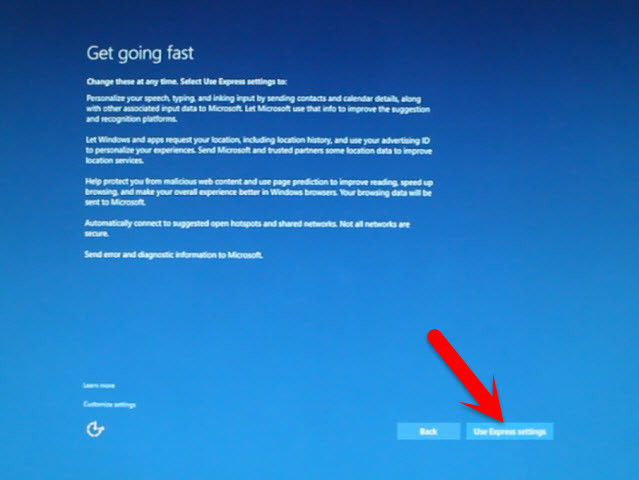
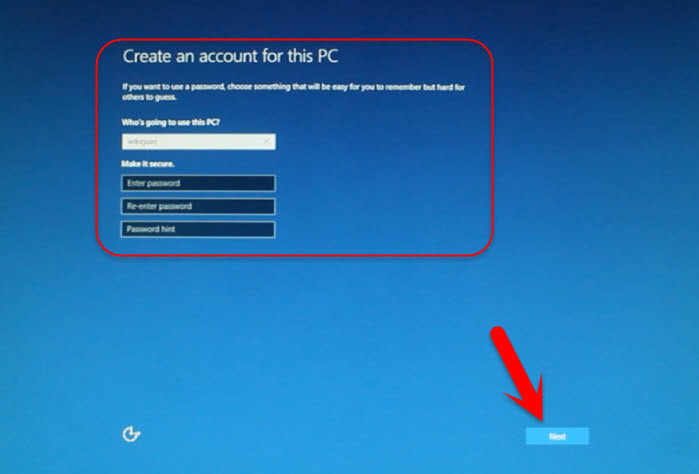
#1. Insert the Bootable USB or the Windows 10 CD\DVD to your PC and Boot your PC with that whether it’s a bootable USB or Windows 10 CD\DVD. When the system booted, enter your language, and other preferences then click Next. #2. Now click Install Now. #3. If the system asked you to enter the Product Key then if you have bought the key from Microsoft, enter the product key otherwise, click Skip. #4. Agree, I accept the terms and click Next. #5. On the type of windows installation click Custom: Install Windows only ( advanced) because we have to install it newly, and there are no windows to upgrade it. #6. Now on the “Where do you want to install Windows?” page, you have to select the partition that you create while installing of Mac OS X El Capitan. After selecting the disk click Next. If you’re unable to click the Next button then once format the same partition that you created for Windows while installing Mac OS X El Capitan, and try again. If still a problem then let us know by comment. Note: Be careful too in the selection because if you select the wrong partition, then you might format and install windows on the Mac OS El Capitan partition. #7. Wait now and let the windows be installed (Depending on your system) and when the installation finishes then you PC will restart automatically after 10 seconds. #8. If the Windows asked again for the Product Key, then click Do this later. #9. When the Window asks to Let’s Get connected, then connect to your wireless access point or click Skip this Step. #10. On the Get going fast Page, click Use Express Settings. #11. On the “Create an account for this PC” page fill the requirements that asked or skip that options that are optional, after that click Next. #12. Wait a while for windows to Setting things up for you. #13. On the “This Won’t Take Long” page don’t shut down or restart your PC. Wait for Windows to Setting up your apps.
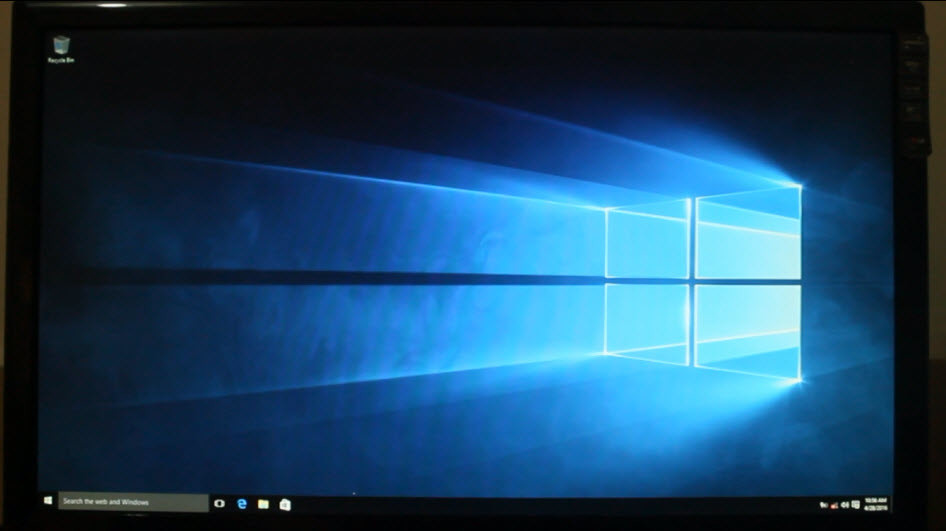
Finish Installation
After performing a clean installation and Set up your Windows 10 then you should see your final result. It was all about, how to dual boot Windows 10 and Mac OS X El Capitan on PC. If you’ve any question, feel free to share in the comment section down below this post.