Windows 11 is more focused on making things easier for users. From navigation to changing settings, everything is much easier in Windows 11. Renaming the PC name has also become quite easier in Windows 11. Changing the name of your PC is not a big deal, and you can easily do it. However, if you don’t know how you can rename your PC, then we are here to help you with that.
Rename PC Name in Windows 11
In this article, we will be discussing all the methods with which you can rename your PC in Windows 11.
1 Rename PC Name in Windows 11 2 What Are The Rules To Rename Your PC?3 Rename Your PC From The Settings4 Rename The PC Using Windows PowerShell5 Rename Your PC Using Command Prompt6 Renaming PC Using System Properties7 Conclusion
What Are The Rules To Rename Your PC?
There are certain rules that you need to remember before you rename your PC in Windows 11. These rules decide what name you can give to your PC.
The name you are using should have standard characters, which includes alphabets from A-Z (in uppercase and lower case), numbers (0-9), and hyphen (-). The name should not have any spaces, and it should also not have special characters including- `[email protected]#$%^&*,The new name should not exceed 15 characters.Your name cannot be made up entirely of numbers. There should be a combination of letters as well as numbers.
Rename Your PC From The Settings
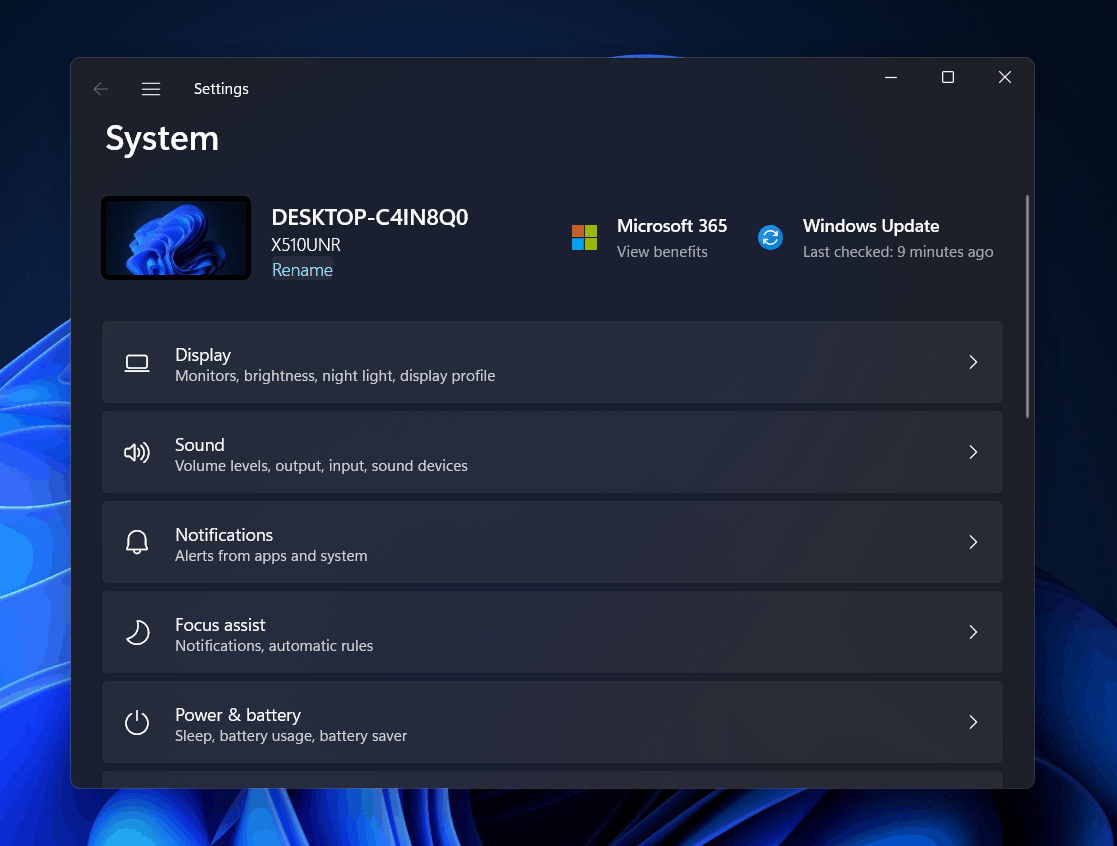
There are two ways to rename your PC from the settings. You can do it directly from the System section where your name appears, or you can do it from the About section in the settings. We will be discussing both the methods to rename your PC. To change your name from the System section, follow the steps given below-
Press the Windows + I key combo to open the Settings app.
Head to the System section in the Settings from the left sidebar, if you are not already on it.
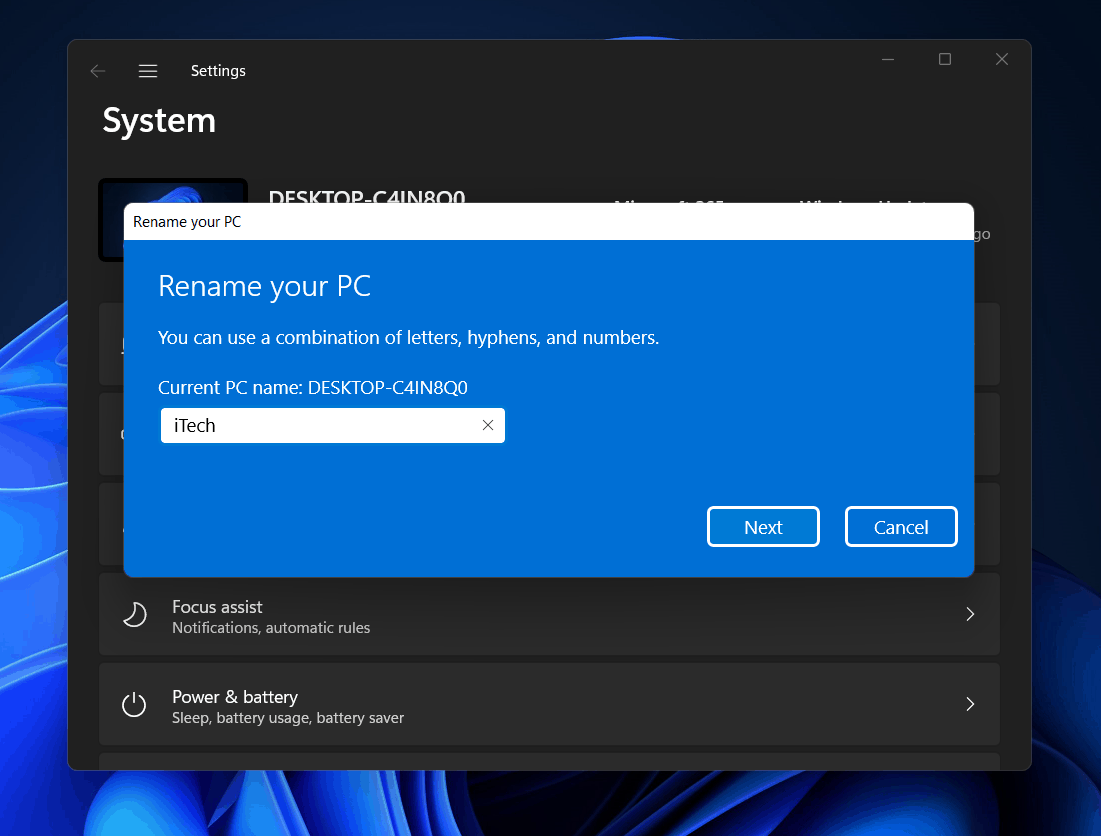
You will see the name of your PC here. Click on Rename to rename your PC.A new window will open up. You will be asked to enter the new name you want to set for the PC. Enter the new name of the PC, and then click on Next. You will be asked to restart your PC. If you want to restart now, then click on Restart Now else you can click on the Restart Later option to restart your PC later.
Another way to do this is-
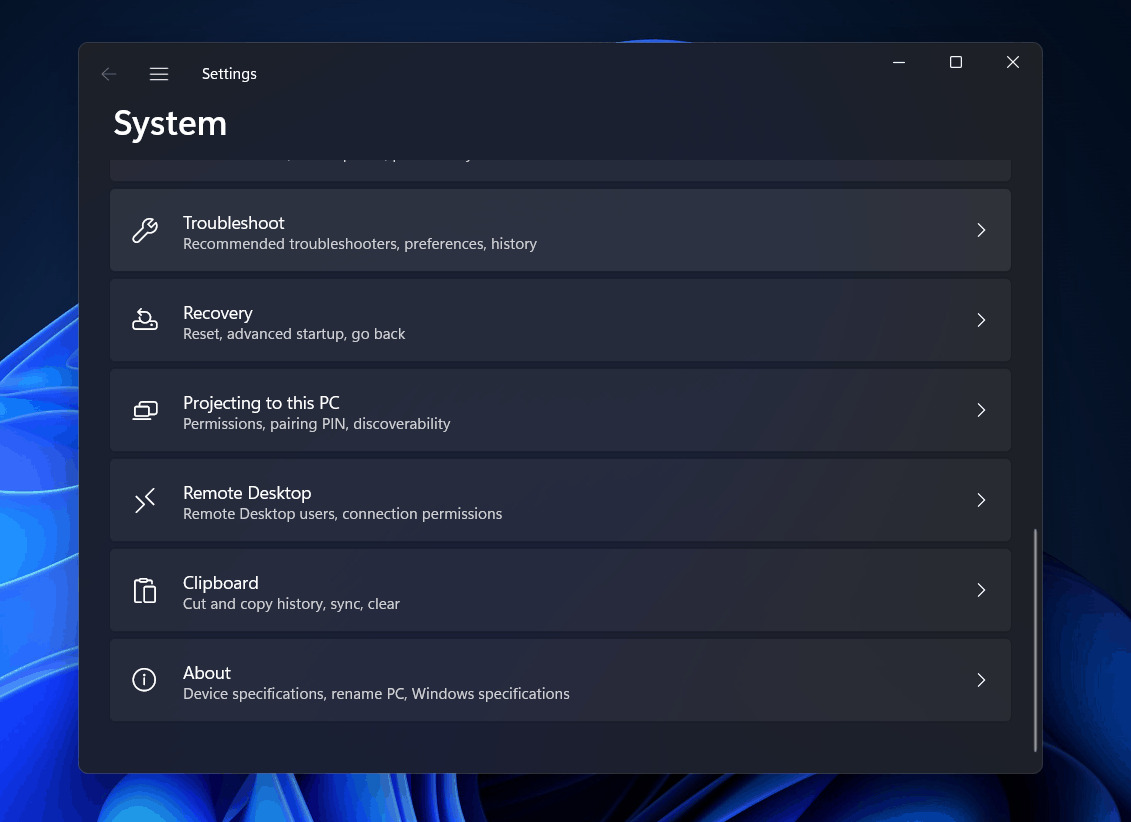
Head to the About option in the System section in Settings.
Here, click on Rename this PC button that you see next to the name of your PC.
Now in the new window that pop-up, enter the name you want to set for your PC. Click on Next to rename your PC to it. Now you will see two options- Restart Now and Restart Later. Click on Restart Now to restart your PC right now, or click on Restart Later if you want to restart your PC later.
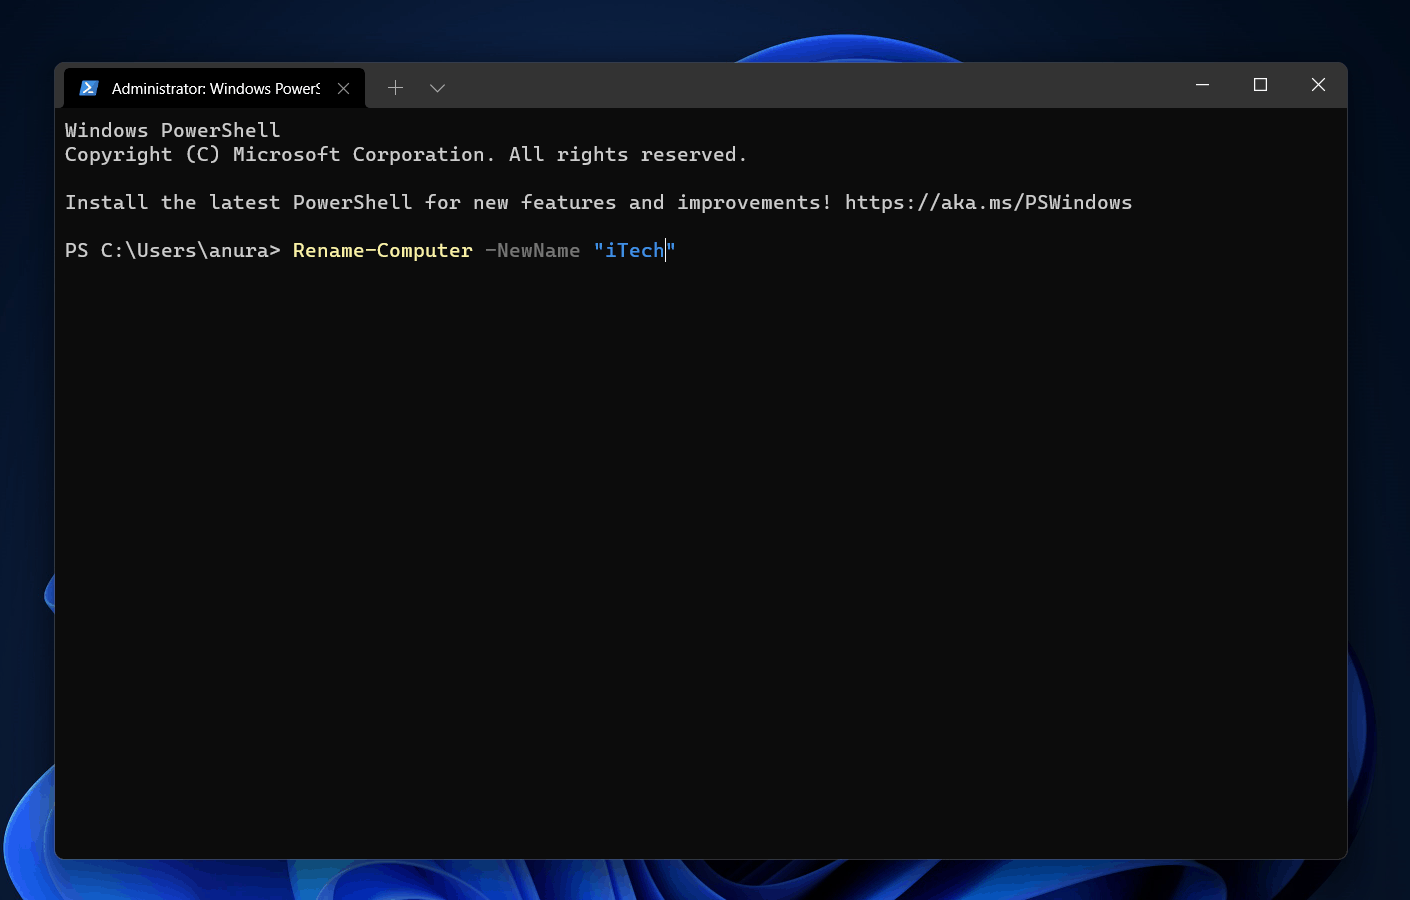
Rename The PC Using Windows PowerShell
You can use Windows PowerShell to rename your PC. To use Windows PowerShell to rename your PC, follow the steps given below-
Press the Windows + X key combo. Now from the menu that opens up, select Windows Terminal (Admin) and open it.In the Windows PowerShell, type Rename-Computer -NewName “xyz” and hit Enter. Here, replace xyz with the new name that you want to keep for your PC.
You will now have to restart your PC for the changes to take place.
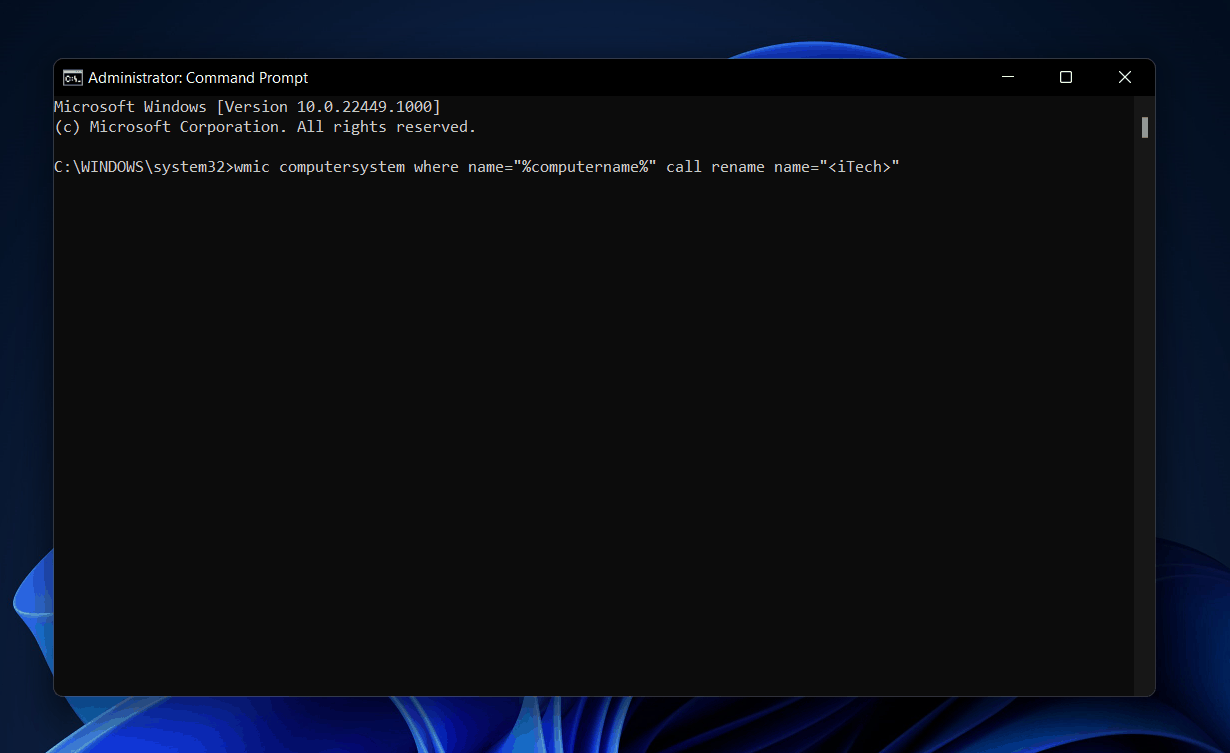
Rename Your PC Using Command Prompt
Another way to rename your PC is using the Command Prompt. The process is similar to the above process where we have mentioned how you can rename your PC using Windows PowerShell. To rename your PC using Command Prompt, follow the steps given below-
In the Start menu, search for Command Prompt. Right-click on the Command Prompt in the search results and then click on Run As Administrator. In the Command Prompt, type wmic computersystem where name=”%computername%” call rename name=”
Now restart your PC to make the changes, and the name of the computer will be changed.
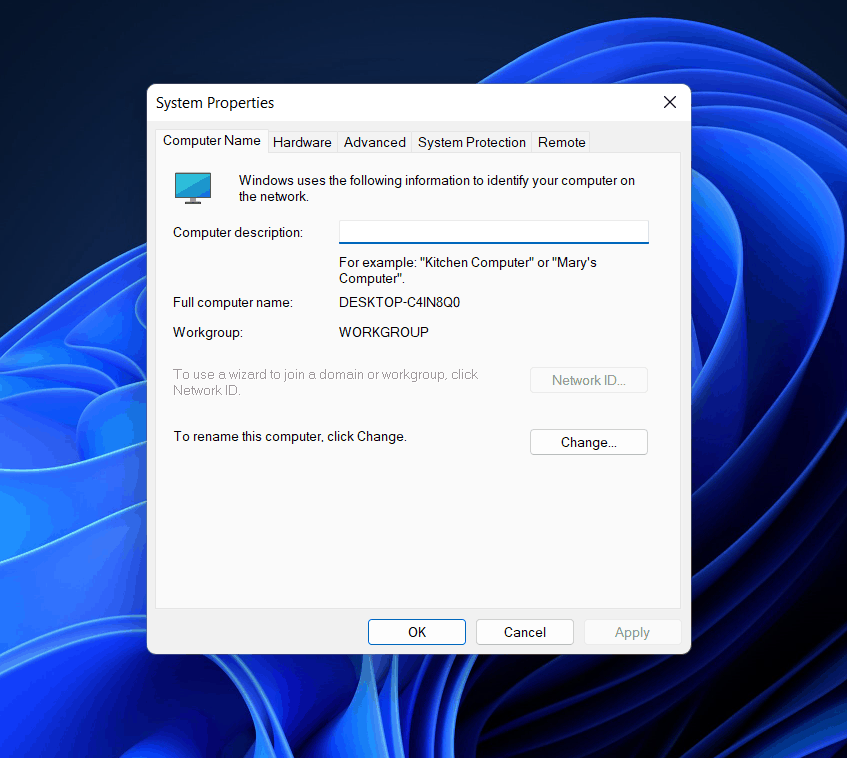
Renaming PC Using System Properties
Another way to rename your PC in Windows 11 is by using System Properties. This method was earlier introduced to Windows, which let users change the name of their PC to whatever they prefer. To rename your PC using the System Properties, follow the steps given below-
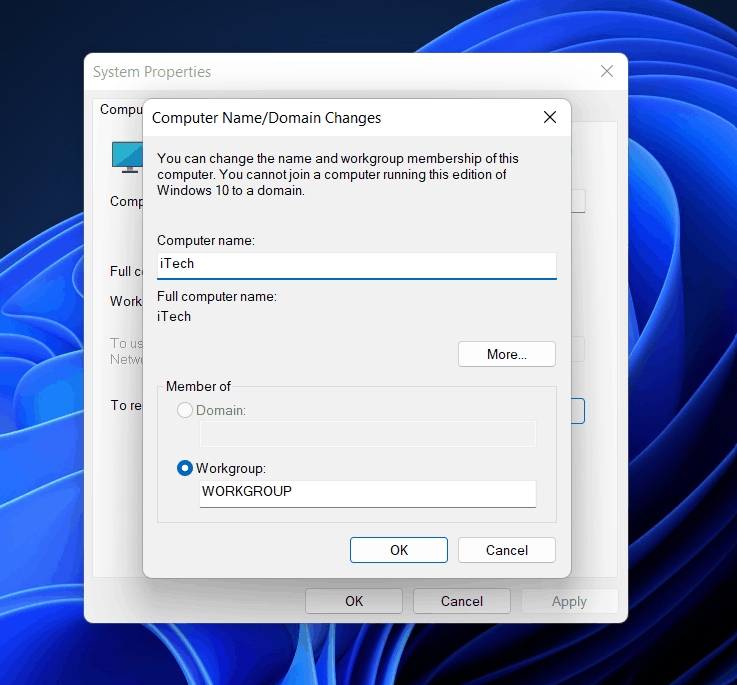
Open the Run dialog box on your PC by pressing the Windows + R key combo. In the Run dialog box, type sysdm.cpl and hit Enter or click on OK. This will open up the System Properties window on your PC.You will be headed to the Computer Name tab in the System Properties. Here click on the Change button.
Now on the next window that opens up, you will be asked to enter the computer name. Enter the name of the computer right below the Computer name section, and click on OK.
You will see a small pop-up window open up on your screen, with a message ‘You must restart your computer to apply these changes.’ Click on OK to close this pop-up window.Now click on the Close button to close the System Properties window.Next, you will get a prompt asking you whether you want to Restart Now or Restart Later. Click on Restart Now to restart your PC right now, and click on Restart Later if you want to restart your PC later.After you restart your PC, the name of it will be changed.
RELATED GUIDES:
How To Fix Windows 11 PC Won’t Shut DownHow To Fix Rounded Corners Disabled In Windows 11How To Defragment Hard Drive In Windows 11 PC
Conclusion
These were all the methods using which you can rename your PC in Windows 11. Following any of the above methods, you will be able to rename your PC in Windows 11. We hope this article helps you with renaming your PC.
Δ