This is a common issue that has been encountered by many users trying to use their external hard drive. One may face this issue for several reasons; it may be because of faulty hard drives, faulty USB drives, incompatible drivers, and various others. Many users are afraid that they may face this error because their hard drive is faulty. There are chances of that happening, but facing this issue doesn’t always mean it is due to faulty hardware; it can be due to conflicting or incompatible drivers or other reasons.
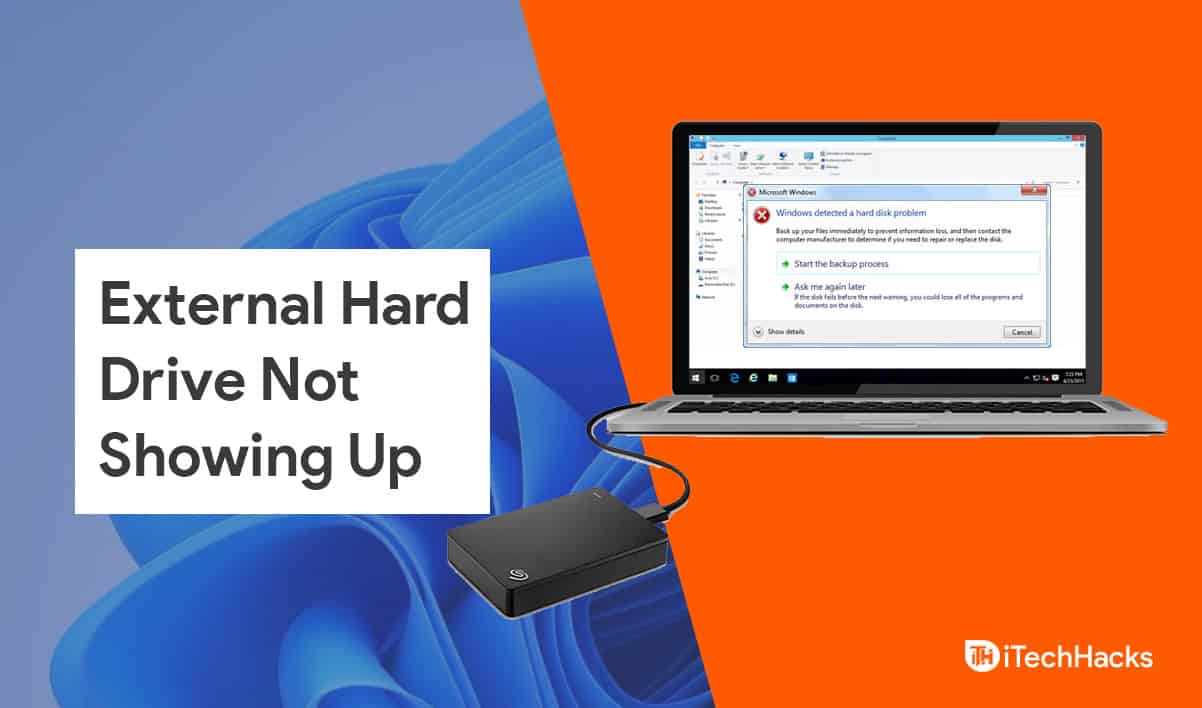
Fix External Hard Drive Not Showing Up In Windows 11
1 Fix External Hard Drive Not Showing Up In Windows 112 Try Some Basic Fixes First3 Check The Disk Management4 Format The External Hard Disk5 Create A New Volume6 Check The Drive Status7 Updating The Hard Drive Drivers8 Reinstall The Hard Drive Drivers9 Final Words
This is not a new issue that you may encounter in Windows 11, as users have reported facing this error in Windows 10. If you are facing this issue, then you need not worry about it. In this article, we will be discussing how you can fix an external hard drive not showing up in Windows 11.
Try Some Basic Fixes First
You should ensure that your drive turns on or not. If you are using an external hard drive, it may have some LED indicator to indicate it has been turned on. You may also hear a fan rotating, which is a sign of the hard drive turning on. If you didn’t notice any such signs, then you may try switching the ports and cable. If the hard drive still didn’t turn on, it means that it is faulty. However, if the hard drive turns on after you switch the port or the cable, that can mean the port or the cable is faulty. If you can use the hard drive after this, then you are good to go. If you still cannot use the hard drive, try using it with a different PC and restart your PC and if that still doesn’t help, then you should move to the steps given ahead.
Check The Disk Management
If your hard drive doesn’t appear on the File Explorer, it may appear on the Disk Management. Disk Management allows you to format your disk, create a new partition, and do various other things. In the case of unallocated space, the hard drive you are trying to use may not show up on File Explorer. Your disk will for sure appear on Disk Management. To open up disk manager, press the Windows + X key combo and select Disk Management in the menu. If your disk is here in the disk management but not showing up in the File Explorer, you should move to the next step to fix the issue.
Format The External Hard Disk
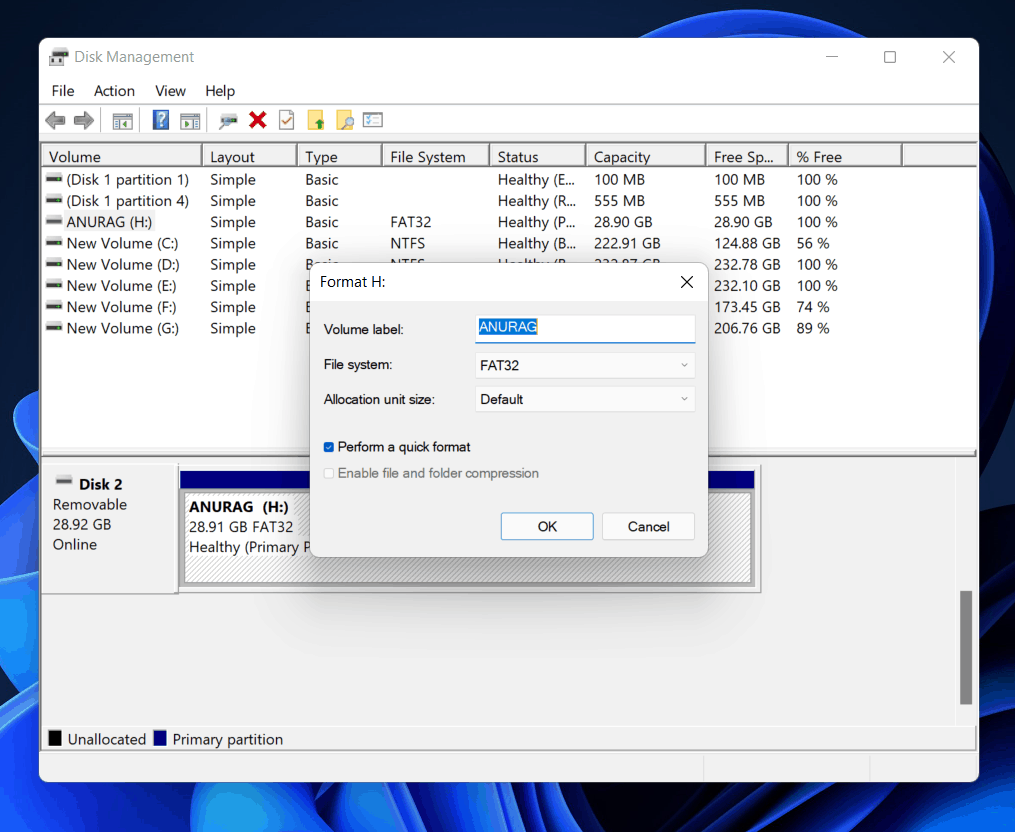
If your hard drive is not showing up in File Explorer, you will have to format it using Disk Management. To format the external hard drive using the Disk Management, follow the steps given below-
Press the Windows + R key combo on your PC to open the Run dialog box.In the Run dialog box, type diskmgmt.msc and click on OK or hit Enter to open the Disk Management. In Disk Management, right-click on the disk with the issue, and then click on Format.
Next, you will be asked to enter volume label, file system, allocation unit size, and also select whether you want a quick format or not. After doing so, click on OK to continue.
This should most probably fix the external hard drive not showing up in Windows 11 issue. However, if you still encounter the issue, then follow the next troubleshooting method.
Create A New Volume
If the external hard drive still didn’t show up in the Disk Management, you should try creating a new volume. To do so, follow the steps given below-
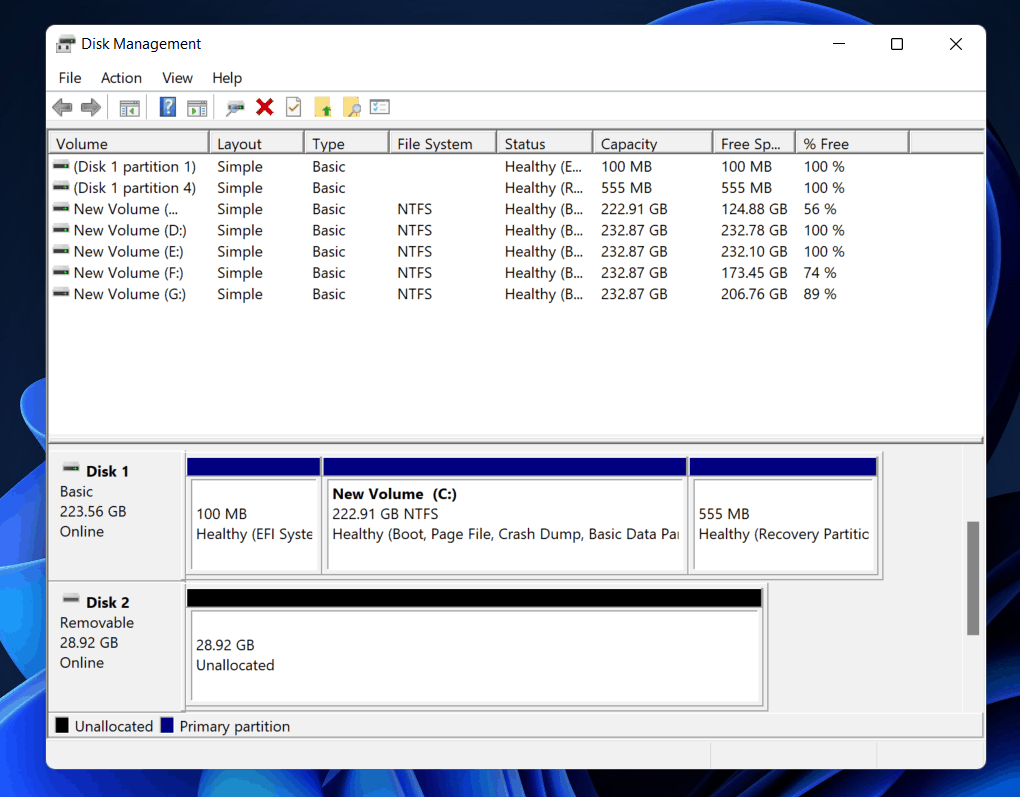
Open the Disk Management from the power menu. To do so, press the Windows + X key combo, and then from the menu, select Disk Management. In the Disk Management, check whether the drive is already an unallocated space or the primary partition. The unallocated space will have a black bar on its top, while the primary partition will have a blue bar. If the drive is a primary partition, you will have to make it unallocated space. If the drive is unallocated space, then you can move to the fourth step.Right-click on the volume/drive having a problem and then click on Delete Volume to delete it and make it unallocated space. After doing so, you will see a black bar on the top of the drive, which means that the drive has successfully been marked as unallocated space. Now you will have to create a new simple volume of the space.
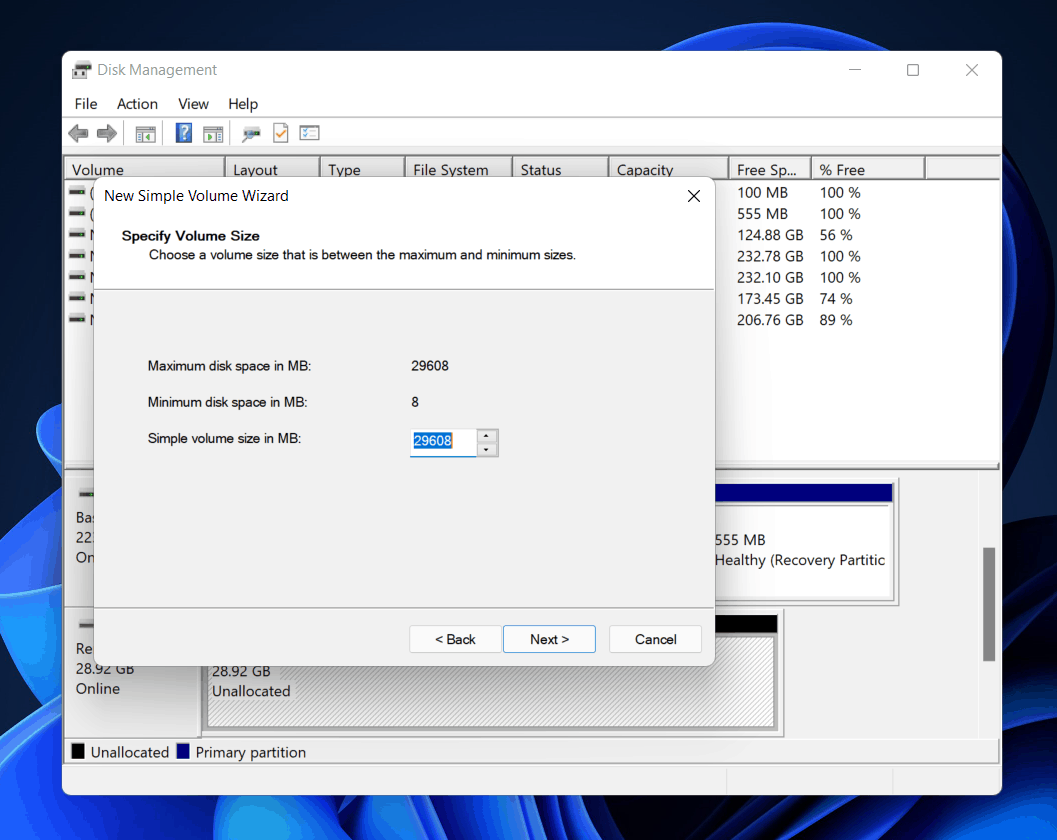
Right-click on the unallocated space, and then click on New Simple Volume. This will open the New Simple Volume Wizard; here, click on Next. You will be asked to enter the Simple Volume Size in MB. The size you enter cannot be more than the maximum disk space. Once done, click on Next.
Next, you will be given two options: assign the drive letter or mount it in the empty NTFS folder. Select Assign the following drive letter and then select the drive letter. Click on Next. You will be asked whether you want to format the drive or not. Select the Format this volume with the following settings option. You will then have to set the file system, allocate unit size, and label the volume. Once you are done with all this, click on Next. The process will be completed. To close the New Simple Volume Wizard, click on Finish.
After you do so, the drive will open up in the File Explorer, which indicates that the issue has been successfully fixed.
Check The Drive Status
You can use the device manager to check the drive status. This will tell you if the device is working fine or not. To check the drive status, follow the steps given below-
In the Start Menu, search for Device Manager, and open it.Now, expand the Disk Drives section by double-clicking on it.Right-click on the drive with the error. Click on properties to open the properties.In the General tab in the properties, you will see the Device Status. Check if it shows the device working properly or not. If it shows any error message, then you can search for it and fix it.
If the device status shows that the device is working properly, you should try updating the drivers or reinstalling them.
Updating The Hard Drive Drivers
You should try updating the hard drivers and then check if you still face the error or not. To update the hard drive drivers, follow the steps given below-
In the Start Menu, search for Device Manager and open it.Now double-click on the Disk Drives section to expand it.Here, right-click on the drive having the error.Click on Update Driver.
After the driver has been updated, close the Device Manager, and restart your PC.
You should now no longer face the external drive not showing up in Windows 11 issue.
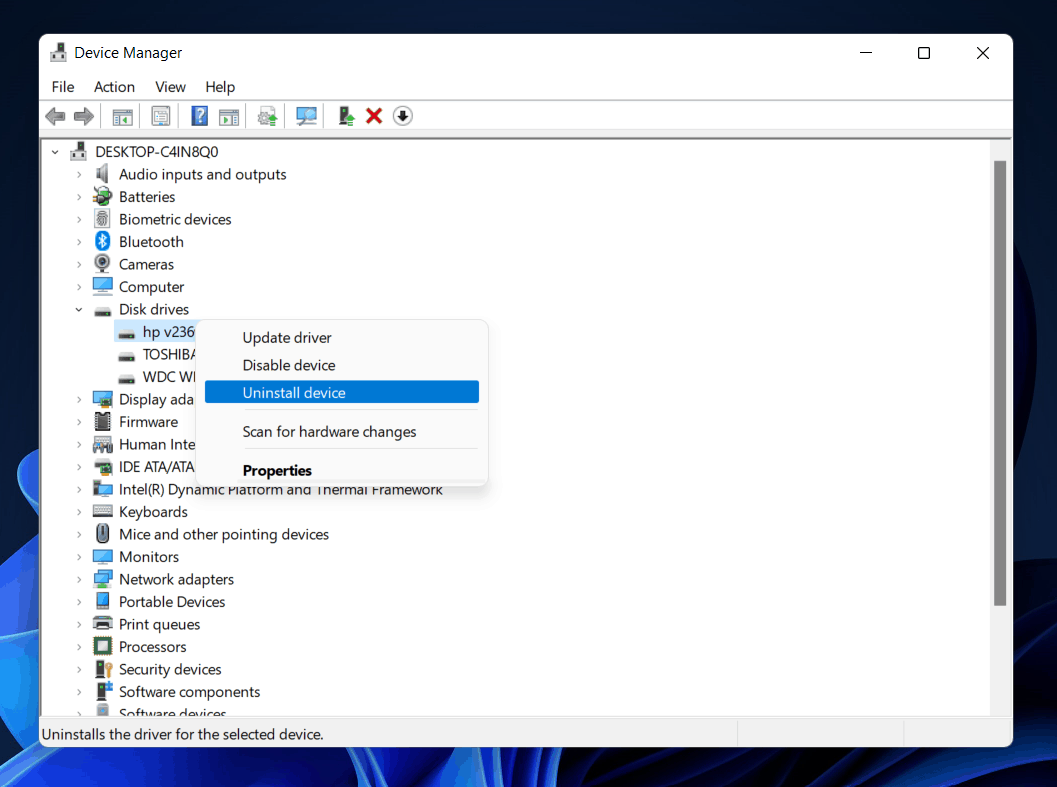
Reinstall The Hard Drive Drivers
If any of the above steps didn’t work for you, then maybe you should try reinstalling the hard drive drivers. You can easily do it with the help of the device manager. To reinstall hard drive drivers using device manager, follow the steps given below-
Open the Device Manager from the Start Menu. Here, double-click on the Disk Drivers option to expand it.Right-click on the drive with the error, and then click on Uninstall device.
After doing so, restart your PC, and this will automatically reinstall the driver on your PC.
RELATED GUIDES:
How To Make File Extensions Visible In Windows 11How To Fix Ethernet Not Working in Windows 11How To Take a Screenshot On Windows 11
Final Words
This should now fix the issue for you. These were a few fixes, following which you will be able to fix the issue of the external hard drive not showing up in Windows 11. We hope this article helped solve the issue you were facing. Add a warning at the very start not to try this if you have data on the harddrive already
Δ